Are you dreaming of juicy, sun-ripened tomatoes bursting with flavor, but lack the space or the time for a traditional garden? Or perhaps you're tired of constantly worrying about whether your tomato plants are getting enough water? Then, the world of self-watering containers might just be your gardening salvation! Let's dive in and explore how you can grow amazing tomatoes using this clever and convenient method. The Magic of Self Watering Containers for Tomato Plants Self-watering containers, sometimes called sub-irrigated planters (SIPs), are designed to provide a consistent and reliable water supply to your plants, minimizing the need for frequent watering and dramatically reducing water waste. For tomato plants, which are known for their thirstiness, this can be a game-changer! The beauty of a tomato plant self watering container lies in its simplicity and efficiency. It essentially creates a mini-reservoir beneath the soil, allowing the plant...
Imagine biting into a sun-ripened cherry tomato, bursting with sweet, tangy flavor, all grown right on your patio! Growing your own cherry tomatoes from seed is easier than you think, and even if you don't have a sprawling garden, a simple pot can be the perfect starting point. Let's get our hands dirty and learn how to plant cherry tomato seeds in a pot, step by step!
Choosing the Right Cherry Tomato Seeds and Pot
The first step in successfully planting cherry tomato seeds in a pot is selecting the right seeds. There are countless varieties of cherry tomatoes, each with its own unique flavor, size, and growth habit. Consider factors like disease resistance, days to maturity, and whether the variety is determinate (bushy) or indeterminate (vining). Indeterminate varieties will need staking or caging to support their growth, while determinate varieties are more compact and suitable for smaller spaces.
Here are a few popular cherry tomato varieties perfect for container gardening:
- Sungold: Known for its exceptionally sweet, golden-orange fruit.
- Sweet Million: A prolific producer of small, red, incredibly sweet tomatoes.
- Black Cherry: A unique variety with dark, almost black-colored fruit and a rich, complex flavor.
- Gardener's Delight: A classic, reliable cherry tomato with a tangy, traditional tomato flavor.
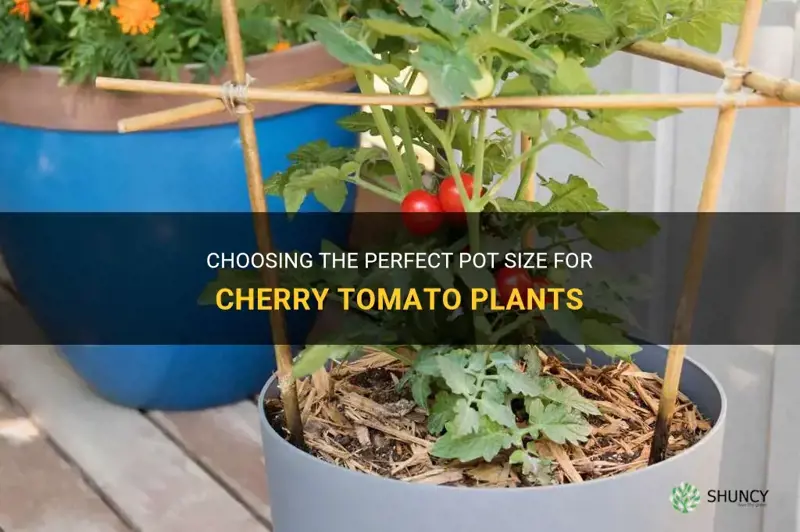
Next, choose a pot that's large enough to accommodate the mature plant. A good rule of thumb is to select a pot that is at least 12 inches in diameter and 12 inches deep. Larger pots (15-20 inches) are even better, as they provide more room for the roots to grow and help retain moisture. Make sure the pot has drainage holes to prevent waterlogging, which can lead to root rot. Terracotta or plastic pots are both suitable, but terracotta pots tend to dry out faster than plastic pots.
Gathering Your Supplies
Before you begin planting, gather all the necessary supplies:
- Cherry tomato seeds
- Potting mix (not garden soil)
- A pot with drainage holes
- Watering can or hose
- Optional: Seed starting tray or small pots
- Optional: Heat mat and grow light (for indoor seed starting)
Why Use Potting Mix? Garden soil is often too heavy and dense for container gardening. It can compact easily, restricting root growth and drainage. Potting mix, on the other hand, is a lightweight, well-draining medium specifically formulated for container plants. Look for a potting mix that contains ingredients like peat moss, perlite, and vermiculite to provide optimal aeration and moisture retention.
Planting Cherry Tomato Seeds
Now for the fun part! Here's a step-by-step guide on how to plant your cherry tomato seeds:
Step 1: Starting Seeds Indoors (Optional but Recommended)
Starting your cherry tomato seeds indoors, 6-8 weeks before the last expected frost, gives them a head start and protects them from harsh weather conditions. Here's how to do it:
- Fill a seed starting tray or small pots with moistened potting mix.
- Sow the seeds about 1/4 inch deep, planting 2-3 seeds per cell or pot.
- Gently water the soil and cover the tray or pots with a clear plastic dome or plastic wrap to create a humid environment.
- Place the tray or pots in a warm location (70-75°F) or use a heat mat to maintain a consistent temperature.
- Once the seeds germinate (usually within 5-10 days), remove the plastic cover and provide plenty of light. If you don't have a sunny window, use a grow light. The Ahopegarden Indoor Garden Hydroponics Growing System, which is a 10-pod plant germination kit with an LED grow light, can be really handy for starting your seeds indoors. You can check it out here: https://amzn.to/3RPpa Sk. These hydroponic systems, also known as a compact indoor garden with an integrated light, can help you get your plants off to a great start!
- Once the seedlings have developed their first true leaves (the leaves that appear after the initial seed leaves), thin them to one plant per cell or pot by snipping off the weaker seedlings at the soil line.
Step 2: Direct Sowing (Planting Directly in the Pot)
If you live in a warm climate with a long growing season, you can sow your cherry tomato seeds directly into the pot. Here's how:
- Fill the pot with moistened potting mix, leaving about an inch of space at the top.
- Sow 2-3 seeds about 1/4 inch deep in the center of the pot.
- Gently water the soil.
- Keep the soil consistently moist until the seeds germinate.
- Once the seedlings emerge, thin them to one plant per pot.
Step 3: Transplanting Seedlings
If you started your seeds indoors, you'll need to transplant them into the pot once they're large enough. Here's how:
- Harden off the seedlings by gradually exposing them to outdoor conditions for a week or two. Start by placing them in a sheltered spot for an hour or two each day, gradually increasing the amount of time they spend outdoors.
- Fill the pot with moistened potting mix.
- Gently remove the seedling from its cell or pot, being careful not to damage the roots.
- Dig a hole in the center of the pot that's large enough to accommodate the root ball.
- Place the seedling in the hole and gently backfill with potting mix.
- Water the soil thoroughly.
Caring for Your Cherry Tomato Plants
Once your cherry tomato plants are established, they'll need regular care to thrive.
Sunlight
Cherry tomato plants need at least 6-8 hours of sunlight per day. Place your pot in a sunny location where it will receive plenty of direct sunlight. If you're growing your plants indoors, use a grow light to supplement natural sunlight.
Watering
Water your cherry tomato plants regularly, especially during hot, dry weather. The soil should be consistently moist but not waterlogged. Check the soil moisture by sticking your finger into the soil. If the top inch of soil is dry, it's time to water. Avoid watering the leaves, as this can encourage fungal diseases. Instead, water the soil at the base of the plant. During periods of rapid growth, container tomatoes may need watering once or even twice a day.
Fertilizing
Cherry tomato plants are heavy feeders and need regular fertilization to produce abundant fruit. Use a balanced fertilizer (e.g., 10-10-10) every 2-3 weeks. Alternatively, you can use a liquid fertilizer diluted according to the package instructions. Look for fertilizers specifically formulated for tomatoes, as these often contain higher levels of potassium, which is essential for fruit production. As your tomatoes begin to flower, switch to a fertilizer that is higher in phosphorus and potassium to encourage blossom and fruit development. Fish emulsion and compost tea are also great natural fertilizers.
Support
As your cherry tomato plants grow, they'll need support to prevent them from toppling over. Use a stake, cage, or trellis to support the plant's stem and branches. Insert the support into the pot when you transplant the seedling to avoid damaging the roots later on. For indeterminate varieties, regular pruning is essential to maintain the plant's shape and encourage air circulation. Remove suckers (the shoots that grow between the main stem and the branches) to prevent the plant from becoming too bushy. Determinate varieties require less pruning.
Pest and Disease Control
Cherry tomato plants are susceptible to a variety of pests and diseases. Monitor your plants regularly for signs of problems, such as aphids, whiteflies, tomato hornworms, and fungal diseases like early blight and Septoria leaf spot. To prevent pest and disease problems, provide good air circulation, avoid overwatering, and remove any infected leaves or plants immediately. You can also use organic pesticides or fungicides to control pests and diseases. For example, insecticidal soap is effective against aphids and whiteflies, while copper fungicide can help prevent fungal diseases.
Harvesting Your Cherry Tomatoes
Cherry tomatoes are typically ready to harvest 60-80 days after transplanting. The fruits should be fully colored and slightly soft to the touch. Gently twist the tomatoes off the plant, being careful not to damage the stem. Harvest your cherry tomatoes regularly to encourage continued production. Overripe tomatoes can attract pests and diseases, so it's important to pick them as soon as they're ripe.
Congratulations! You've successfully planted cherry tomato seeds in a pot and are on your way to enjoying delicious, homegrown tomatoes all season long. With a little care and attention, you'll be rewarded with a bountiful harvest of sweet, juicy cherry tomatoes that you can enjoy fresh from the garden or use in your favorite recipes. Happy gardening!