Are you dreaming of juicy, sun-ripened tomatoes bursting with flavor, but lack the space or the time for a traditional garden? Or perhaps you're tired of constantly worrying about whether your tomato plants are getting enough water? Then, the world of self-watering containers might just be your gardening salvation! Let's dive in and explore how you can grow amazing tomatoes using this clever and convenient method. The Magic of Self Watering Containers for Tomato Plants Self-watering containers, sometimes called sub-irrigated planters (SIPs), are designed to provide a consistent and reliable water supply to your plants, minimizing the need for frequent watering and dramatically reducing water waste. For tomato plants, which are known for their thirstiness, this can be a game-changer! The beauty of a tomato plant self watering container lies in its simplicity and efficiency. It essentially creates a mini-reservoir beneath the soil, allowing the plant...
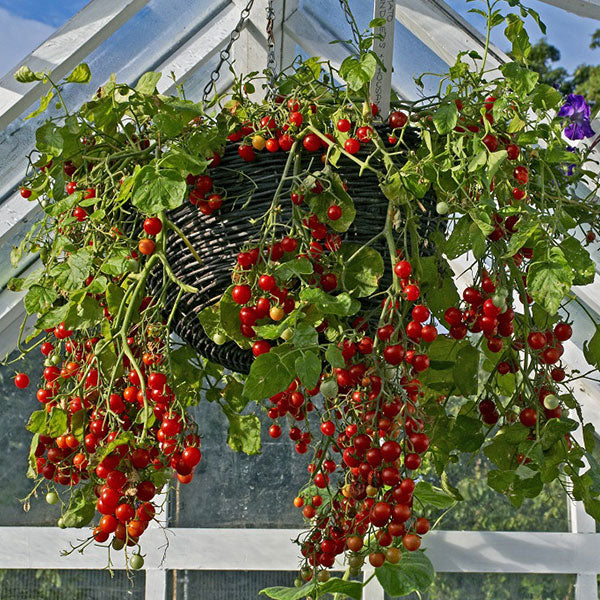
There's nothing quite like the burst of sweet, tangy flavor you get from a homegrown cherry tomato, still warm from the sun. And the best part? Growing your own cherry tomatoes is easier than you might think! This guide will walk you through everything you need to know about sowing cherry tomato seeds, from choosing the right varieties to nurturing those tiny seedlings into thriving plants that will reward you with a bountiful harvest.
Let's Talk About Sowing Cherry Tomato Seeds
Sowing cherry tomato seeds is the first step towards enjoying delicious, homegrown tomatoes. But before you start scattering seeds, let's get a few things straight. Knowing when and how to sow your seeds will drastically improve your chances of success. We'll cover everything from timing and materials to the actual sowing process.
When is the Best Time to Sow Cherry Tomato Seeds?
Timing is crucial when it comes to sowing cherry tomato seeds. Cherry tomatoes, like all tomatoes, are warm-season plants, meaning they thrive in warm temperatures and plenty of sunlight. They are very sensitive to frost. The best time to start your seeds indoors is typically6-8 weeks before the last expected frost in your area. This will give your seedlings enough time to develop into strong, healthy plants before transplanting them outdoors.
To determine your area's last expected frost date, you can consult local weather resources, your local agricultural extension office, or online gardening calendars. Simply search for "[your zip code] last frost date" online to find relevant information.
Here's a general guideline based on climate:
- Cool Climates (short growing season): Start seeds indoors 8 weeks before the last frost.
- Temperate Climates (moderate growing season): Start seeds indoors 6-7 weeks before the last frost.
- Warm Climates (long growing season): Start seeds indoors 4-6 weeks before the last frost, or sow seeds directly outdoors after the last frost has passed.
Gathering Your Materials: What You'll Need to Sow Cherry Tomato Seeds
Before you dive in, make sure you have all the necessary materials on hand. This will make the sowing process smoother and more efficient. Here's a list of essentials:
- Cherry tomato seeds: Choose a variety that suits your taste and growing conditions. There are hundreds of cherry tomato varieties, each with unique characteristics. Some popular choices include 'Sweet 100', 'Sungold', 'Black Cherry', and 'Grape'. Consider factors like disease resistance, fruit size, and plant size when making your selection.
- Seed starting tray or small pots: These provide a contained environment for your seedlings to germinate and grow. Look for trays with drainage holes to prevent waterlogging.
- Seed starting mix: This is a sterile, lightweight potting mix specifically designed for starting seeds. It's different from regular potting soil, which can be too heavy and may contain pathogens that can harm seedlings.
- Watering can or spray bottle: You'll need a gentle way to water your seeds and seedlings without disturbing them.
- Heat mat (optional): Tomato seeds germinate best in warm temperatures (70-80°F). A heat mat can provide consistent warmth and speed up germination.
- Grow light (optional): Seedlings need plenty of light to grow strong and healthy. If you don't have a sunny windowsill, a grow light can provide the necessary illumination. Consider a full spectrum LED grow light for optimal growth.
- Labels: Labeling your seed trays or pots is essential to keep track of which variety you're growing. Use waterproof markers to avoid smudging.
Step-by-Step Guide: How to Sow Cherry Tomato Seeds
Now for the fun part! Here's a detailed guide on how to sow your cherry tomato seeds:
Step 1: Prepare Your Seed Starting Trays or Pots
Fill your seed starting trays or pots with seed starting mix. Gently tap the trays or pots to settle the mix and remove any air pockets. Make sure the mix is evenly distributed and level with the top of the container.
Step 2: Sow the Seeds
Create small indentations in the seed starting mix, about ¼ inch deep. You can use your finger, a pencil, or a dibber. Place 2-3 seeds in each indentation. This increases the chances of at least one seed germinating. Space the indentations about 1-2 inches apart to give the seedlings room to grow.
Step 3: Cover the Seeds
Gently cover the seeds with a thin layer of seed starting mix. Lightly pat the surface to ensure the seeds are in contact with the soil. This helps with moisture retention and germination.
Step 4: Water Thoroughly
Water the seed starting mix gently but thoroughly. Use a watering can with a fine rose or a spray bottle to avoid dislodging the seeds. The mix should be evenly moist but not waterlogged. If you're using a heat mat, place the trays or pots on the mat after watering.
Step 5: Provide Light
If you don't have a sunny windowsill, place the trays or pots under a grow light. Keep the light on for 14-16 hours per day. Position the light a few inches above the seedlings to prevent them from becoming leggy. If using a windowsill, rotate the trays or pots daily to ensure even light exposure.
Step 6: Maintain Warmth and Moisture
Keep the seed starting mix consistently moist but not soggy. Check the moisture level daily and water as needed. The ideal temperature for germination is 70-80°F. Use a heat mat or place the trays or pots in a warm location to maintain this temperature.
Caring for Your Cherry Tomato Seedlings After Sowing
Once your cherry tomato seeds germinate, it's crucial to provide proper care to ensure they grow into strong, healthy plants. Here's what you need to do:
Thinning Seedlings
After the seedlings have developed their first true leaves (the leaves that appear after the initial cotyledons or seed leaves), thin them to one seedling per cell or pot. Choose the strongest, healthiest-looking seedling and gently snip off the others at the soil line using scissors or nail clippers. Thinning prevents overcrowding and ensures that each seedling has enough space and nutrients to thrive.
Watering
Continue to water your seedlings regularly, keeping the soil consistently moist but not soggy. Avoid overwatering, as this can lead to root rot. Water in the morning to allow the foliage to dry before nightfall, which can help prevent fungal diseases.
Fertilizing
Once the seedlings have developed their second set of true leaves, start fertilizing them with a diluted liquid fertilizer. Use a fertilizer specifically formulated for seedlings or a balanced fertilizer diluted to half strength. Fertilize every 1-2 weeks to provide the seedlings with the nutrients they need to grow.
Hardening Off
Before transplanting your cherry tomato seedlings outdoors, you'll need to "harden them off." This process gradually acclimates the seedlings to the outdoor environment, reducing the risk of shock. About 1-2 weeks before the last expected frost, start taking the seedlings outdoors for a few hours each day. Gradually increase the amount of time they spend outdoors, exposing them to more sunlight and wind. After a week or two, they should be ready to be transplanted into your garden. It's important to note that you should not leave them out if temperatures are too cold or severe weather is expected.
Growing your own cherry tomatoes from seed is a rewarding experience that allows you to enjoy the freshest, most flavorful tomatoes possible. By following these tips and providing proper care, you can ensure a bountiful harvest of delicious cherry tomatoes. If you are looking for an easier option to get started, consider theAhopegarden Indoor Garden Hydroponics Growing System, which allows you to quickly germinate seeds indoors with its advanced LED grow light and hydroponic system. This hydrophonic planter groweris great for harvesting lettuce and herbs too! Check it out here:https://amzn.to/3RPpa Sk