Are you dreaming of juicy, sun-ripened tomatoes bursting with flavor, but lack the space or the time for a traditional garden? Or perhaps you're tired of constantly worrying about whether your tomato plants are getting enough water? Then, the world of self-watering containers might just be your gardening salvation! Let's dive in and explore how you can grow amazing tomatoes using this clever and convenient method. The Magic of Self Watering Containers for Tomato Plants Self-watering containers, sometimes called sub-irrigated planters (SIPs), are designed to provide a consistent and reliable water supply to your plants, minimizing the need for frequent watering and dramatically reducing water waste. For tomato plants, which are known for their thirstiness, this can be a game-changer! The beauty of a tomato plant self watering container lies in its simplicity and efficiency. It essentially creates a mini-reservoir beneath the soil, allowing the plant...
Imagine biting into a perfectly ripe, juicy tomato, bursting with flavor, knowing you grew it yourself. That delicious dream starts long before the warm summer sun kisses your garden. It begins with tiny seeds and a little bit of effort. Growing your own tomato seedlings is not only rewarding but also economical, giving you control over the varieties you grow and ensuring strong, healthy plants ready to thrive in your garden. So, let's embark on this exciting journey of nurturing life from seed to seedling!
How to Make Tomato Seedlings: A Comprehensive Guide
Why Start Your Own Tomato Seedlings?
There are numerous compelling reasons tomake your own tomato seedlings instead of purchasing them from a nursery. Here are a few key benefits:
- Cost Savings: Buying seedlings can be expensive, especially if you want to grow multiple varieties. Starting from seed dramatically reduces the cost per plant.
- Variety Selection: Nurseries often carry a limited selection of tomato varieties. Growing your own allows you to choose from a vast array of heirlooms, hybrids, and unique cultivars. You can discover tomato types you never knew existed!
- Control Over Growing Conditions: You have complete control over the soil, light, and watering schedule, ensuring your seedlings get the best possible start. This is especially important if you are growing organically.
- Hardening Off: When you grow your own seedlings, you can properly harden them off before transplanting them to the garden. This process gradually acclimates the plants to outdoor conditions, reducing transplant shock.
- Timing: You can precisely time your planting based on your local climate and growing season. This is critical for maximizing your harvest.
For example, if you are located in a northern climate with a short growing season, starting your tomato seedlings indoors early is essential for getting a good crop. Conversely, in warmer climates, you can start seeds later in the season.
Essential Materials for Making Tomato Seedlings
Before you begin, gather the following materials:
- Tomato Seeds: Choose high-quality seeds from a reputable source. Consider factors like disease resistance, flavor, and growth habit when selecting varieties.
- Seed Starting Mix: This is a lightweight, sterile mix specifically formulated for seed germination. Avoid using garden soil, as it can contain pathogens and weed seeds. A good mix consists of peat moss, vermiculite, and perlite.
- Seed Starting Trays or Containers: You can use plastic seed starting trays with individual cells, peat pots, or even recycled containers like yogurt cups (with drainage holes).
- Humidity Dome (Optional): A humidity dome helps retain moisture and promotes germination. A plastic bag can be used as a substitute.
- Grow Lights: Tomato seedlings need plenty of light to grow strong and healthy. If you don't have a sunny windowsill, consider using grow lights.
- Watering Can or Spray Bottle: Use a gentle watering method to avoid disturbing the seeds.
- Heat Mat (Optional): A heat mat can speed up germination, especially in cooler environments.
- Labels: Label each tray or container with the tomato variety.
Investing in quality materials can make a significant difference in the success of your seedlings. Don't skimp on the seed starting mix or grow lights, as these are crucial for healthy growth.
Step-by-Step Guide: How to Make Tomato Seedlings
Now, let's dive into the step-by-step process ofhow to create tomato seedlings:
1. Sowing the Seeds
Moisten the seed starting mix thoroughly. Fill the seed starting trays or containers with the moistened mix, leaving about half an inch of space at the top. Make a small indentation (about ¼ inch deep) in the center of each cell or container. Place one or two tomato seeds in each indentation. Cover the seeds with a thin layer of seed starting mix and gently water them in.
Pro Tip: Soaking your tomato seeds in lukewarm water for a few hours before planting can improve germination rates.
2. Providing the Right Environment
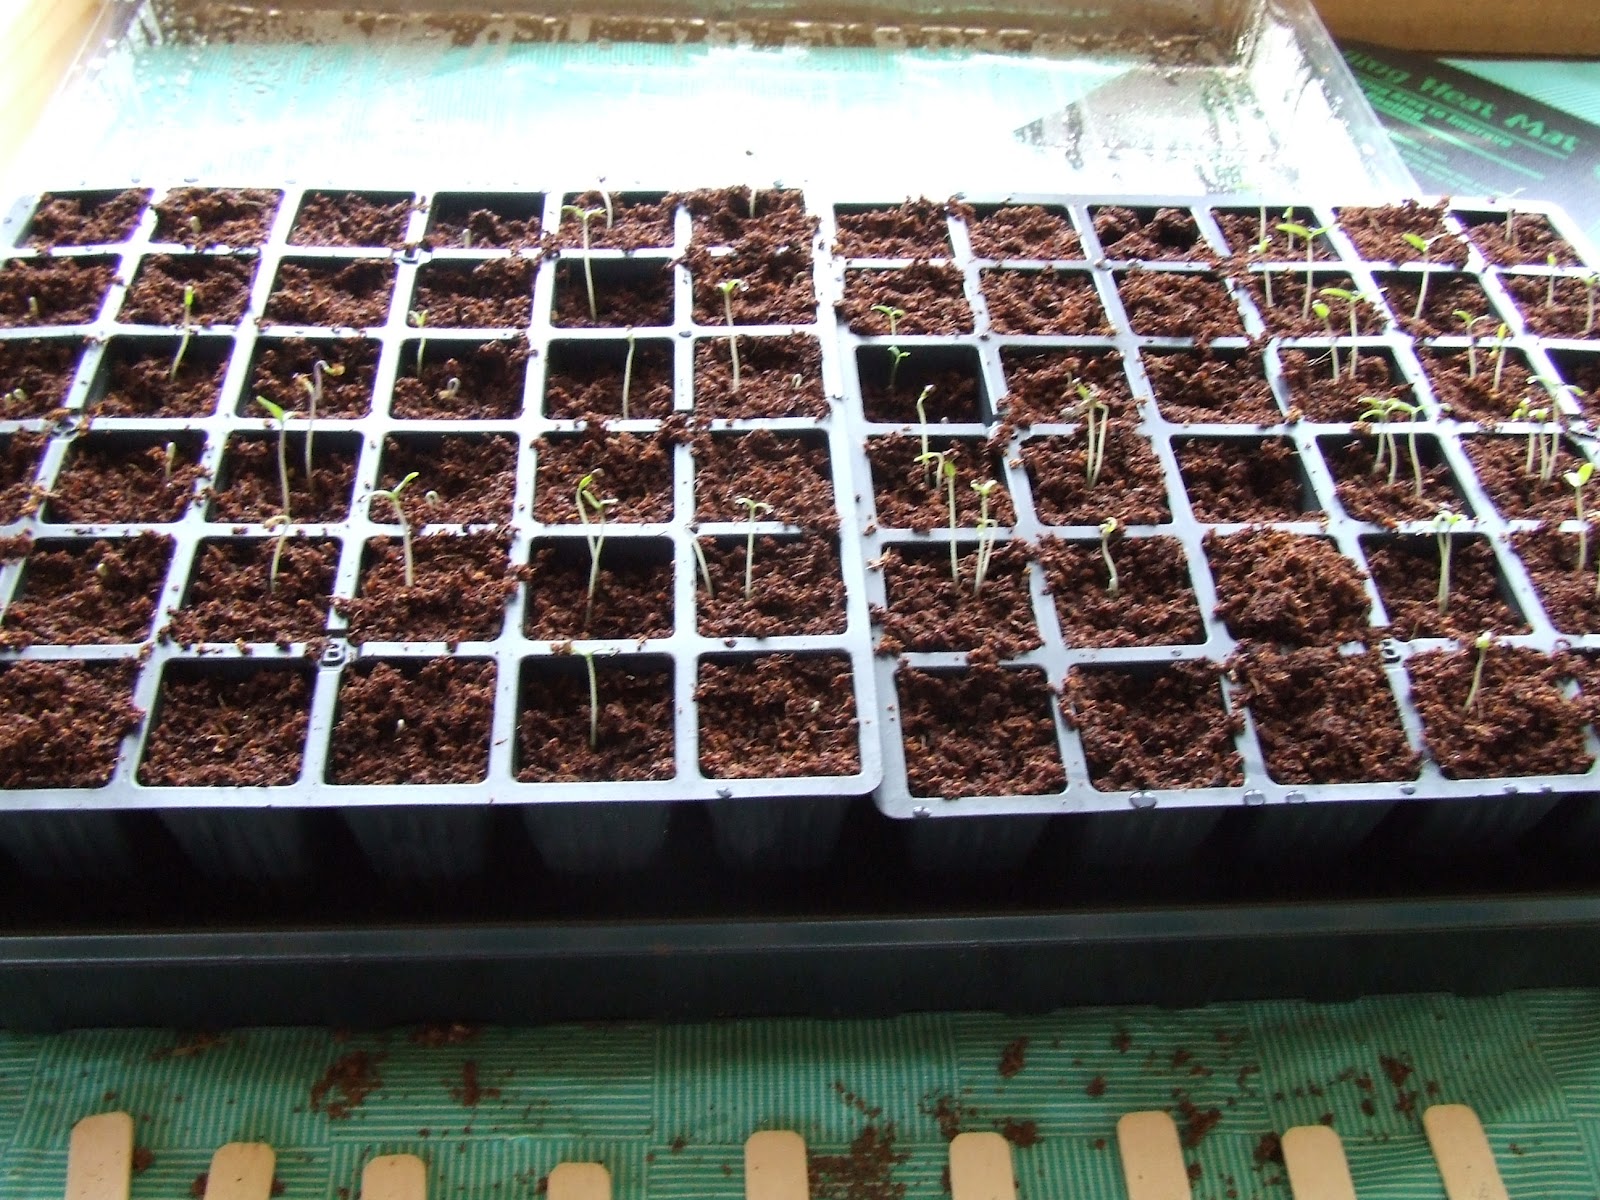
Cover the seed starting trays with a humidity dome or place them in a plastic bag to create a humid environment. Place the trays on a heat mat (if using) and position them under grow lights or in a sunny windowsill. Maintain a temperature of 70-80°F (21-27°C) for optimal germination. Keep the seed starting mix consistently moist, but not waterlogged. Check the moisture level daily and water as needed.
Important Note: Overwatering can lead to damping-off, a fungal disease that can kill seedlings. Ensure proper drainage and avoid letting the soil stay soggy.
3. Germination and Initial Growth
Tomato seeds typically germinate within 5-10 days. Once the seedlings emerge, remove the humidity dome or plastic bag. If using grow lights, position them a few inches above the seedlings. Adjust the height of the lights as the seedlings grow. Continue to water the seedlings as needed, allowing the soil to dry slightly between waterings.
4. Thinning the Seedlings
If you planted two seeds per cell or container and both germinate, you'll need to thin the seedlings. Once the seedlings have their first true leaves (the leaves that appear after the initial seed leaves), use small scissors to carefully snip off the weaker of the two seedlings at soil level. Avoid pulling the seedlings, as this can damage the roots of the remaining plant.
5. Transplanting to Larger Containers (Potting Up)
Once the seedlings have developed several sets of true leaves and are about 2-3 inches tall, it's time to transplant them to larger containers. This gives them more room to grow and develop a strong root system. Use 3-4 inch pots and fill them with a potting mix suitable for vegetables. Gently remove the seedlings from their original containers, being careful not to damage the roots. Plant the seedlings in the new pots, burying them slightly deeper than they were before. Water them in well and place them back under the grow lights or in a sunny windowsill.
6. Hardening Off the Seedlings
Before transplanting your tomato seedlings to the garden, you need to harden them off. This process gradually acclimates them to outdoor conditions, such as sunlight, wind, and temperature fluctuations. Start by placing the seedlings outdoors in a sheltered location for a few hours each day. Gradually increase the amount of time they spend outdoors over the course of a week or two. Protect them from frost and strong winds. After the hardening-off period, your tomato seedlings will be ready to thrive in your garden!
Troubleshooting Common Problems When Making Tomato Seedlings
Even with the best intentions, you might encounter some challenges whenlearning how to make tomato seedlings. Here are some common problems and how to address them:
- Poor Germination: This can be caused by old or poor-quality seeds, incorrect temperature, or insufficient moisture. Ensure you use fresh seeds, maintain the proper temperature, and keep the soil consistently moist.
- Leggy Seedlings: Leggy seedlings are tall and spindly with weak stems. This is usually caused by insufficient light. Move the seedlings closer to the grow lights or provide more natural light.
- Damping-Off: This fungal disease causes seedlings to rot at the soil level. To prevent damping-off, use a sterile seed starting mix, avoid overwatering, and provide good air circulation.
- Yellowing Leaves: Yellowing leaves can indicate nutrient deficiencies or overwatering. Ensure you are using a good quality potting mix and avoid letting the soil stay soggy.
Enhance Your Seed Starting Experience
If you're looking for an even easier way to get started with seed germination, consider exploring indoor gardening systems. Ahopegarden Indoor Garden Hydroponics Growing System offers a 10-pod plant germination kit with aeroponic technology and an LED grow light. It's a fantastic way to effortlessly start herbs, vegetables, or even your tomato seedlings! Check it out on Amazon here: https://amzn.to/3RPpa Sk and discover how this indoor planter can help you have a bountiful harvest.
Conclusion
Learninghow to make tomato seedlings is a rewarding experience that allows you to grow your own delicious, homegrown tomatoes. By following these steps and troubleshooting any problems that arise, you can successfully nurture strong, healthy seedlings and enjoy a bountiful harvest. So, grab your seeds, get your hands dirty, and start growing your own little slice of tomato heaven!