Are you dreaming of juicy, sun-ripened tomatoes bursting with flavor, but lack the space or the time for a traditional garden? Or perhaps you're tired of constantly worrying about whether your tomato plants are getting enough water? Then, the world of self-watering containers might just be your gardening salvation! Let's dive in and explore how you can grow amazing tomatoes using this clever and convenient method. The Magic of Self Watering Containers for Tomato Plants Self-watering containers, sometimes called sub-irrigated planters (SIPs), are designed to provide a consistent and reliable water supply to your plants, minimizing the need for frequent watering and dramatically reducing water waste. For tomato plants, which are known for their thirstiness, this can be a game-changer! The beauty of a tomato plant self watering container lies in its simplicity and efficiency. It essentially creates a mini-reservoir beneath the soil, allowing the plant...
There's nothing quite like the taste of a sun-ripened tomato, bursting with flavor, straight from your own garden. But that deliciousness starts long before you're picking those juicy red gems. It all begins with a tiny seed, full of potential. Let's explore the rewarding journey of planting tomato seeds and growing your own flavorful harvest.
Why Plant Tomato Seeds Yourself?
Sure, you can buy tomato seedlings from a nursery, but there's something deeply satisfying about nurturing a plant from the very beginning. Planting tomato seeds allows you to choose from a much wider variety of tomato types. You're no longer limited to what the local garden center carries. Want to try a rare heirloom variety? Starting tomato seeds yourself gives you the freedom to explore the world of tomatoes, from the tiny currant tomatoes to the giant beefsteaks. Plus, it's often more cost-effective to grow your own from seed.
Beyond the practical benefits, there's also the sheer joy of watching a tiny seed sprout and grow into a thriving plant. It's a connection to nature and a reminder of the incredible power of life. The simple act of nurturing a seedling offers a sense of accomplishment and a deeper appreciation for the food we eat.
When to Start Planting Tomato Seeds
Timing is everything when it comes to planting tomato seeds. You need to start early enough to have mature seedlings ready to transplant outdoors after the last frost, but not so early that they become root-bound and leggy indoors.
Calculating the Right Time
The general rule of thumb is to start your tomato seeds indoors 6-8 weeks before the last expected frost date in your area. To determine this date, you can:
- Consult your local agricultural extension office: They often have detailed information on average frost dates for your specific region.
- Use online resources: Many websites and weather services provide historical frost data.
- Ask experienced gardeners in your neighborhood: They can offer valuable insights based on their own observations and experiences.
For example, if your last expected frost date is May 15th, you should aim to start your tomato seeds indoors around late March or early April. Keep in mind that this is just a guideline, and you may need to adjust based on your specific climate and microclimate. Warmer climates might benefit from starting seeds a little later, while colder climates may need to start them earlier.
What Happens If I Plant My Tomato Seeds Too Early or Too Late?
Planting tomato seeds too early can lead to several problems. Your seedlings may become overcrowded, leggy (tall and spindly), and nutrient-deficient while waiting for warmer weather to arrive. They might also become root-bound in their containers, which can stunt their growth after transplanting.
On the other hand, planting tomato seeds too late means you'll have a shorter growing season, and your plants may not have enough time to produce a full harvest before the first frost in the fall. You might still get some tomatoes, but you'll likely miss out on the peak season of abundance.
Materials You'll Need for Planting Tomato Seeds
Gathering your materials before you start planting tomato seeds will make the process smoother and more efficient. Here's a list of what you'll need:
- Tomato Seeds: Choose your varieties carefully based on your climate, preferences, and growing space.
- Seed Starting Mix: This is a sterile, lightweight potting mix specifically designed for seed germination.
- Seed Starting Trays or Containers: You can use plastic seed trays, peat pots, recycled yogurt cups, or any other small containers with drainage holes.
- Humidity Dome (Optional): This helps maintain consistent moisture levels and promotes germination.
- Heat Mat (Optional): This provides bottom heat, which can speed up germination.
- Grow Lights (Recommended): These provide supplemental light to prevent leggy seedlings.
- Watering Can or Spray Bottle: Use a gentle watering method to avoid disturbing the seeds.
- Labels: To identify your different tomato varieties.
Speaking of starting your indoor garden, consider the Ahopegarden Indoor Garden Hydroponics Growing System, a complete indoor system designed for plant germination. This innovative plant germination kit utilizes aeroponic herb vegetable growth, featuring an LED grow light and a countertop design, making it easy to harvest fresh lettuce and other greens. You can find it on Amazon here: https://amzn.to/3RPpa Sk
Step-by-Step Guide to Planting Tomato Seeds
Now that you have your materials, let's dive into the process of planting tomato seeds:
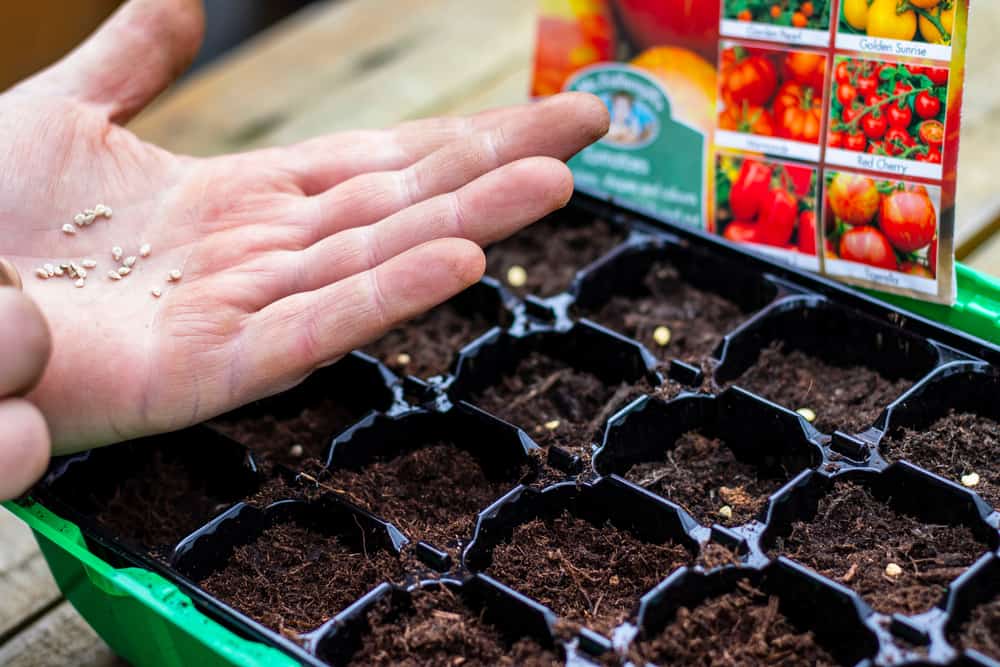
- Prepare Your Containers: Fill your seed starting trays or containers with seed starting mix, leaving about ½ inch of space at the top. Gently tamp down the soil.
- Sow the Seeds: Make a small indentation (about ¼ inch deep) in the center of each cell or container. Place 2-3 tomato seeds in each indentation. This increases the chances of at least one seed germinating.
- Cover the Seeds: Gently cover the seeds with seed starting mix.
- Water Thoroughly: Use a watering can or spray bottle to thoroughly moisten the soil. Be careful not to wash away the seeds.
- Provide Humidity: Cover the trays or containers with a humidity dome or plastic wrap to create a humid environment.
- Provide Warmth: Place the trays or containers on a heat mat or in a warm location (around 70-75°F).
- Provide Light: Once the seeds germinate, remove the humidity dome and place the seedlings under grow lights. Keep the lights on for 14-16 hours per day.
- Water Regularly: Keep the soil consistently moist, but not soggy. Water when the top inch of soil feels dry to the touch.
- Thin Seedlings: Once the seedlings have developed their first true leaves (the leaves that appear after the initial seed leaves), thin them to one seedling per cell or container. Choose the strongest, healthiest-looking seedling and snip off the others at the soil line with scissors. This prevents overcrowding and ensures that each seedling has enough space and nutrients to thrive.
Caring for Tomato Seedlings
After planting tomato seeds and they have germinated, proper care is crucial to ensure strong, healthy seedlings that are ready for transplanting.
Light Requirements
Tomato seedlings need plenty of light to grow strong and avoid becoming leggy. Natural sunlight is ideal, but most indoor environments don't provide enough consistent light, especially during the winter months. Grow lights are the best solution for providing supplemental light. Position the lights a few inches above the seedlings and adjust the height as they grow.
Watering and Fertilizing
Water your tomato seedlings regularly, but avoid overwatering. Allow the top inch of soil to dry out slightly between waterings. Overwatering can lead to root rot, which can be fatal to seedlings. Once the seedlings have developed a few sets of true leaves, you can start fertilizing them with a diluted liquid fertilizer specifically formulated for seedlings. Follow the instructions on the fertilizer package carefully.
Hardening Off
Before transplanting your tomato seedlings outdoors, you need to "harden them off." This process gradually acclimates the seedlings to the outdoor environment, reducing the risk of shock and stress. About a week or two before transplanting, start taking the seedlings outdoors for a few hours each day. Gradually increase the amount of time they spend outdoors, and expose them to more sunlight and wind each day. This will help them toughen up and adapt to the conditions they'll face in your garden.
Transplanting Tomato Seedlings
Once the danger of frost has passed and your tomato seedlings are hardened off, it's time to transplant them into your garden. Choose a sunny location with well-drained soil.
Preparing the Soil
Before transplanting, amend your soil with compost or other organic matter to improve its fertility and drainage. Dig a hole that is slightly larger than the root ball of the seedling.
Transplanting Technique
Gently remove the seedling from its container and loosen the root ball slightly. Place the seedling in the hole and backfill with soil. Bury the stem up to the first set of leaves. This encourages the development of more roots along the buried stem, resulting in a stronger, more productive plant.
Watering and Mulching
Water the transplanted seedlings thoroughly. Apply a layer of mulch around the base of the plants to help retain moisture, suppress weeds, and regulate soil temperature.
Planting tomato seeds is a rewarding experience that allows you to grow your own delicious tomatoes. By following these steps and providing your seedlings with proper care, you'll be well on your way to a bountiful harvest.