Are you dreaming of juicy, sun-ripened tomatoes bursting with flavor, but lack the space or the time for a traditional garden? Or perhaps you're tired of constantly worrying about whether your tomato plants are getting enough water? Then, the world of self-watering containers might just be your gardening salvation! Let's dive in and explore how you can grow amazing tomatoes using this clever and convenient method. The Magic of Self Watering Containers for Tomato Plants Self-watering containers, sometimes called sub-irrigated planters (SIPs), are designed to provide a consistent and reliable water supply to your plants, minimizing the need for frequent watering and dramatically reducing water waste. For tomato plants, which are known for their thirstiness, this can be a game-changer! The beauty of a tomato plant self watering container lies in its simplicity and efficiency. It essentially creates a mini-reservoir beneath the soil, allowing the plant...
Imagine biting into a juicy, sun-ripened tomato in the dead of winter, a burst of summer flavor transported directly to your taste buds. Seems impossible, right? Well, not if you embrace the magic of hydroponics! Starting tomato seeds hydroponically is a rewarding experience that opens the door to year-round tomato harvests, regardless of the weather outside.
Why Start Tomato Seeds Hydroponically?
Hydroponics, at its core, is the art of growing plants without soil. Instead, plants receive their nutrients from a water-based solution, delivered directly to their roots. This method offers several advantages when starting tomato seeds. When thinking abouthydroponically starting tomato seeds, consider these benefits:
- Faster Germination: Hydroponics provides consistent moisture and temperature, creating an ideal environment for seed germination, often resulting in faster and more uniform sprouting than traditional soil-based methods.
- Reduced Risk of Soilborne Diseases: Eliminating soil eliminates the risk of damping-off and other common soilborne diseases that can plague young tomato seedlings. This means healthier and stronger plants from the very beginning.
- Efficient Nutrient Uptake: Hydroponic systems deliver nutrients directly to the roots, allowing seedlings to absorb them more efficiently. This promotes rapid growth and development.
- Controlled Environment: You have complete control over the environmental factors, such as light, temperature, and humidity, optimizing conditions for successful seed starting.
- Space Saving: Hydroponics is great to use in small spaces. If you have limited space, you can easily make a hydroponic setup in your home without using too much space.
These advantages makehydroponic tomato seed starting a compelling choice for both novice and experienced gardeners. By bypassing the challenges associated with soil, you can give your tomato plants a head start and ensure a bountiful harvest.
Choosing the Right Hydroponic System for Tomato Seed Starting
Selecting the right hydroponic system is crucial for successfullystarting your tomato seeds hydroponically. Several options are available, each with its own pros and cons. Here's a breakdown of some popular choices:
- Deep Water Culture (DWC): This simple system involves suspending seedling roots in a nutrient-rich solution that is aerated with an air stone. DWC is inexpensive and easy to set up, making it a good option for beginners. However, it may not be ideal for larger tomato plants as they mature.
- Wick System: A wick system is a passive type of hydroponic system that relies on capillary action to draw nutrient solution from a reservoir to the growing medium. This system is also very simple and low-cost, suitable for smaller seedlings.
- Nutrient Film Technique (NFT): NFT involves flowing a thin film of nutrient solution over the roots of the seedlings, providing them with constant access to nutrients and oxygen. NFT is more complex than DWC but can be very efficient for growing multiple plants.
- Ebb and Flow (Flood and Drain): In an ebb and flow system, the growing tray is periodically flooded with nutrient solution and then drained back into the reservoir. This system provides excellent aeration to the roots and is suitable for a variety of plants, including tomatoes.
- Aeroponics: Aeroponics is a more advanced system where plant roots are suspended in air and periodically sprayed with nutrient solution. Aeroponics promotes rapid growth and efficient nutrient uptake but requires careful monitoring and maintenance.
Forstarting tomato seeds hydroponically, a simple DWC or wick system is often the most practical choice. These systems are easy to set up, maintain, and are perfect for nurturing young seedlings until they are ready to be transplanted into a larger hydroponic system or into soil.
Essential Supplies for Starting Tomato Seeds Hydroponically
To embark on yourhydroponic tomato seed starting journey, you'll need to gather some essential supplies. Having these items on hand will ensure a smooth and successful start.
- Tomato Seeds: Choose high-quality tomato seeds from a reputable source. Consider the variety of tomato you want to grow and select seeds that are suitable for your climate and growing conditions. Some popular varieties for hydroponics include cherry tomatoes, grape tomatoes, and determinate (bush) tomatoes.
- Hydroponic System: Select a suitable hydroponic system based on your budget, space, and desired level of automation. As mentioned earlier, DWC or wick systems are excellent choices for beginners.
- Growing Medium: Although hydroponics doesn't use soil, you'll still need a growing medium to support the seedlings and provide a place for their roots to anchor. Rockwool cubes, coco coir, and perlite are popular choices.
- Nutrient Solution: Use a hydroponic nutrient solution specifically formulated for tomatoes. These solutions contain the essential macro and micronutrients that tomato plants need to thrive. Follow the manufacturer's instructions carefully when mixing the nutrient solution.
- p H Meter and Adjuster: Maintaining the correct p H level is crucial for nutrient absorption. A p H meter allows you to measure the p H of the nutrient solution, and p H up or p H down solutions can be used to adjust the p H as needed. The ideal p H range for tomatoes in hydroponics is typically between 5.5 and
6.5.
- Grow Lights: Tomato seedlings need adequate light to grow strong and healthy. If you don't have access to natural sunlight, use grow lights to supplement or replace sunlight. LED grow lights are energy-efficient and provide the full spectrum of light that plants need.
- Air Pump and Air Stone: If you're using a DWC system, you'll need an air pump and air stone to aerate the nutrient solution. Aeration is essential for providing oxygen to the roots, preventing root rot, and promoting healthy growth.
- Seedling Tray and Humidity Dome: These items help to create a warm and humid environment for seed germination.
Investing in high-quality supplies will pay off in the long run by increasing your chances of success and producing healthy, vigorous tomato seedlings.
Step-by-Step Guide to Starting Tomato Seeds Hydroponically
Now that you have your supplies, let's dive into the step-by-step process ofstarting tomato seeds hydroponically. Follow these instructions carefully to ensure a successful start.
- Prepare the Growing Medium: Soak your chosen growing medium (e.g., rockwool cubes or coco coir) in water or a diluted nutrient solution. This will help to hydrate the medium and provide the seeds with moisture.
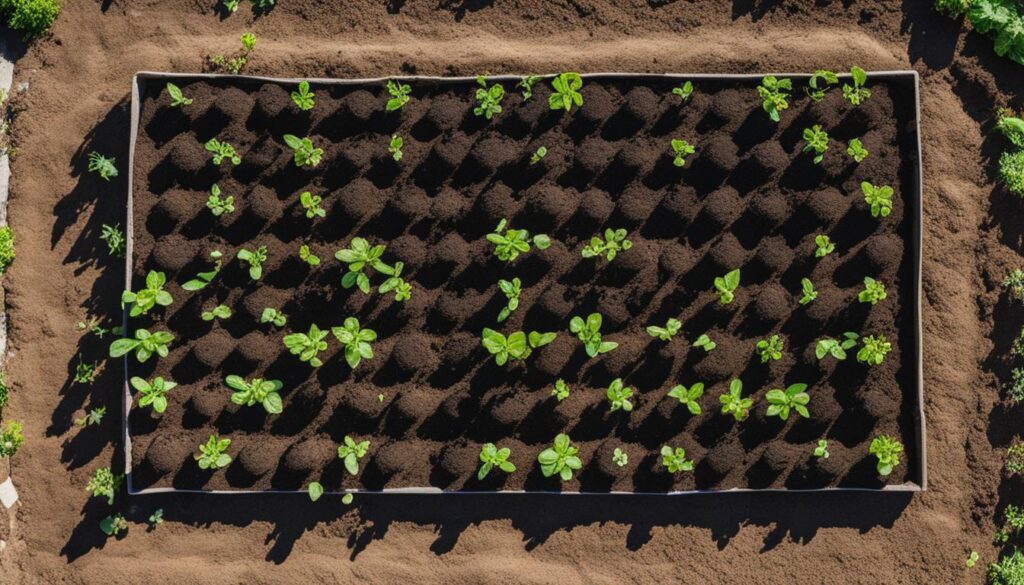
- Sow the Seeds: Gently place one or two tomato seeds into each cube or cell of the growing medium. Cover the seeds lightly with the medium.
- Create a Humid Environment: Place the growing medium in a seedling tray and cover it with a humidity dome. This will help to maintain a high level of humidity, which is essential for seed germination.
- Provide Light and Warmth: Place the seedling tray under grow lights or in a warm, sunny location. Maintain a temperature of around 70-75°F (21-24°C).
- Monitor Moisture Levels: Check the growing medium regularly to ensure that it remains moist but not waterlogged. If the medium starts to dry out, mist it with water.
- Germination: Tomato seeds typically germinate within 5-10 days. Once the seedlings emerge, remove the humidity dome and lower the grow lights to a distance of a few inches above the plants.
- Nutrient Solution: Once the seedlings have developed their first true leaves (the leaves that appear after the initial seed leaves), you can begin feeding them with a diluted hydroponic nutrient solution. Start with a half-strength solution and gradually increase the concentration as the plants grow.
- Transplanting: When the seedlings have developed a few sets of true leaves and their roots are well-established, they are ready to be transplanted into your chosen hydroponic system or into soil.
Following these steps will set you up for success when*starting tomato seeds hydroponically. Remember to monitor your seedlings closely and adjust your techniques as needed to provide them with the best possible growing environment.
Troubleshooting Common Issues when Starting Tomato Seeds Hydroponically
Even with the best planning, you may encounter some challenges whenstarting tomato seeds hydroponically. Here are some common issues and how to address them.
- Poor Germination: If your tomato seeds aren't germinating, it could be due to several factors, including old seeds, improper temperature, or lack of moisture. Ensure that you're using fresh seeds, maintaining a warm temperature, and keeping the growing medium moist.
- Damping-Off: Damping-off is a fungal disease that can cause seedlings to wilt and die. To prevent damping-off, use a sterile growing medium, avoid overwatering, and provide good ventilation. You can also treat the seedlings with a fungicide if necessary.
- Nutrient Deficiencies: If your seedlings are showing signs of nutrient deficiencies, such as yellowing leaves or stunted growth, it could be due to an imbalance in the nutrient solution. Check the p H of the solution and adjust it as needed. Ensure that you're using a hydroponic nutrient solution specifically formulated for tomatoes.
- Algae Growth: Algae can grow in hydroponic systems, especially if they are exposed to light. To prevent algae growth, keep the nutrient solution covered and use opaque containers. You can also add a small amount of hydrogen peroxide to the nutrient solution to kill algae.
- Pests: While hydroponics reduces the risk of soilborne pests, seedlings can still be susceptible to pests such as aphids and whiteflies. Inspect your seedlings regularly for pests and treat them with an appropriate insecticide if necessary.
By being proactive and addressing problems promptly, you can overcome challenges and ensure the health and vitality of your tomato seedlings.
For those eager to jumpstart their indoor gardening adventures, consider the Ahopegarden Indoor Garden Hydroponics Growing System. This 10-pod hydroponics kit is perfect for germinating seeds and growing herbs and vegetables indoors. With its aeroponic system and LED grow light, the Ahopegarden Growing System is designed to provide optimal conditions for plant growth. Check it out here: Ahopegarden Indoor Garden Hydroponics Growing System: 10 Pods Plant Germination Kit Aeroponic Herb Vegetable Growth Lamp Countertop with LED Grow Light - Hydrophonic Planter Grower Harvest Lettuce
Moving Forward: Transplanting and Maintaining Your Hydroponic Tomatoes
Once your tomato seedlings are strong and healthy, it's time to transplant them into your chosen hydroponic system or into soil. This transition is a critical step that requires careful attention to ensure the continued growth and productivity of your plants.
- Transplanting into a Hydroponic System: If you're transplanting into a hydroponic system, gently remove the seedlings from their growing medium and place them into the net pots or other containers designed for your system. Ensure that the roots are properly positioned and that they have access to the nutrient solution.
- Transplanting into Soil: If you're transplanting into soil, choose a well-draining potting mix and dig a hole large enough to accommodate the root ball. Gently remove the seedlings from their growing medium and place them into the hole. Water thoroughly after transplanting.
After transplanting, it's essential to monitor your plants closely and provide them with the appropriate care. This includes:
- Light: Ensure that your plants are receiving adequate light, either from natural sunlight or grow lights. Tomatoes need at least 6-8 hours of direct sunlight per day.
- Nutrients: Continue to feed your plants with a balanced hydroponic nutrient solution. Adjust the nutrient concentration as needed based on the plants' growth and development.
- Watering: If you're growing in soil, water your plants regularly, allowing the soil to dry slightly between waterings.
- Support: As your tomato plants grow, they will need support to prevent them from falling over. Use stakes, cages, or trellises to provide support.
- Pruning: Prune your tomato plants regularly to remove suckers (the shoots that grow between the main stem and the branches). Pruning helps to improve air circulation, reduce the risk of disease, and promote fruit production.
With proper care and attention, your hydroponically started tomato seedlings will thrive and produce a bountiful harvest of delicious, home-grown tomatoes.
Starting tomato seeds hydroponically is a rewarding and efficient way to grow your own tomatoes, regardless of the season. With the right system, supplies, and techniques, you can enjoy fresh, flavorful tomatoes year-round. Embrace the power of hydroponics and unlock the potential for a thriving indoor garden.