Are you dreaming of juicy, sun-ripened tomatoes bursting with flavor, but lack the space or the time for a traditional garden? Or perhaps you're tired of constantly worrying about whether your tomato plants are getting enough water? Then, the world of self-watering containers might just be your gardening salvation! Let's dive in and explore how you can grow amazing tomatoes using this clever and convenient method. The Magic of Self Watering Containers for Tomato Plants Self-watering containers, sometimes called sub-irrigated planters (SIPs), are designed to provide a consistent and reliable water supply to your plants, minimizing the need for frequent watering and dramatically reducing water waste. For tomato plants, which are known for their thirstiness, this can be a game-changer! The beauty of a tomato plant self watering container lies in its simplicity and efficiency. It essentially creates a mini-reservoir beneath the soil, allowing the plant...
Imagine biting into a juicy, sun-ripened tomato you grew yourself, even when it's cold outside. The secret? Starting your tomato seeds indoors! It's easier than you think, and with a little know-how, you'll be enjoying homegrown tomatoes long before your neighbors.
Best Way to Start Tomato Seeds Indoors: A Comprehensive Guide
Growing tomatoes from seed indoors is a rewarding experience that allows you to get a head start on the growing season. This comprehensive guide will walk you through the best methods for planting tomato seeds indoors, from choosing the right seeds to transplanting your seedlings outdoors. We'll cover everything you need to know to ensure a successful tomato harvest.
Why Start Tomato Seeds Indoors?
Starting tomato seeds indoors offers several advantages over direct sowing. Firstly, it extends the growing season. Tomato plants require a long growing season, typically 60-90 days from transplanting. By starting seeds indoors 6-8 weeks before the last expected frost, you give your plants a significant head start. Secondly, indoor growing provides a controlled environment. You can regulate temperature, humidity, and light, creating optimal conditions for germination and early growth. Finally, starting indoors protects seedlings from pests and diseases that are prevalent outdoors, particularly during the vulnerable early stages of growth.
Choosing the Right Tomato Seeds
The first step in successfully planting tomato seeds indoors is selecting the right variety. Consider your local climate, the size of your garden, and your personal preferences. There are two main types of tomatoes: determinate and indeterminate. Determinate varieties grow to a fixed size and produce all their fruit at once, making them ideal for canning or small gardens. Indeterminate varieties continue to grow and produce fruit throughout the season, requiring staking or caging.
Here's a quick rundown of popular tomato varieties:
'Early Girl': An early-maturing indeterminate variety, perfect for cooler climates. 'Roma':A determinate variety known for its paste-like texture, ideal for sauces and canning. 'Beefsteak':A large, indeterminate variety with a meaty texture, great for sandwiches. 'Cherry':A small, sweet, and prolific indeterminate variety, perfect for snacking. 'Brandywine':An heirloom indeterminate variety prized for its exceptional flavor.
When purchasing seeds, choose reputable suppliers and look for disease-resistant varieties. Check the seed packet for information on germination rates and planting instructions.
Gathering Your Supplies
Before you start planting, gather all the necessary supplies. This will streamline the process and prevent any last-minute scrambling. Here's a checklist of essential items:
Tomato seeds: Choose your preferred variety based on your climate and preferences. Seed starting trays or containers: These should have drainage holes to prevent waterlogging. Seed starting mix: Use a light, sterile mix specifically formulated for starting seeds. Water: Use distilled or filtered water to avoid introducing harmful chemicals or minerals. Spray bottle: For gently misting the soil. Heat mat (optional): To provide bottom heat and speed up germination. Grow lights (optional): To supplement natural light, especially during winter months. Plant labels: To keep track of different varieties. Small trowel or spoon: For transplanting seedlings. Humidity dome (optional): To maintain consistent moisture levels.
If you are looking to make things easier, consider purchasing aseed starting kit with a humidity dome. A self-watering option will help keep the soil moist without overwatering. Check out this Plant Seedling Starter Kitwith a humidity dome, the 5-Pack 60-Cell Plant Seedling Tray, and Reusable Germination Trays for Indoor Gardening Seeds Growing Starting. It can be found on Amazon here: https://amzn.to/3RMLITT
The Planting Process: Step-by-Step
Now that you have your supplies and seeds, it's time to get planting! Follow these steps for optimal results:
1.Prepare the seed starting mix: Moisten the seed starting mix with water until it is damp but not soggy.
2.Fill the trays or containers: Fill the seed starting trays or containers with the moistened mix, leaving about half an inch of space at the top.
3.Sow the seeds: Make a small indentation in the soil, about ¼ inch deep. Place 2-3 seeds in each indentation. This increases the chances of at least one seed germinating.
4.Cover the seeds: Gently cover the seeds with the seed starting mix.
5.Water thoroughly: Use a spray bottle to mist the soil until it is evenly moist. Avoid overwatering, which can lead to damping off.
6.Cover with a humidity dome (optional): Place a humidity dome over the trays or containers to maintain consistent moisture levels.
7.Provide warmth: Place the trays or containers on a heat mat or in a warm location. The ideal temperature for tomato seed germination is between 75-85°F (24-29°C).
8.Monitor for germination: Check the trays or containers daily for signs of germination. Tomato seeds typically germinate within 5-10 days.
Enhancing Germination: Tips and Tricks
To further enhance germination rates, consider the following tips:
Soak the seeds: Soaking tomato seeds in water for 24 hours before planting can soften the seed coat and speed up germination. Use a germination tray: A germination tray with a built-in heating element can provide consistent warmth and moisture. Maintain consistent moisture: Keep the soil consistently moist but not waterlogged. Provide adequate light: Once the seeds germinate, provide adequate light to prevent leggy seedlings.
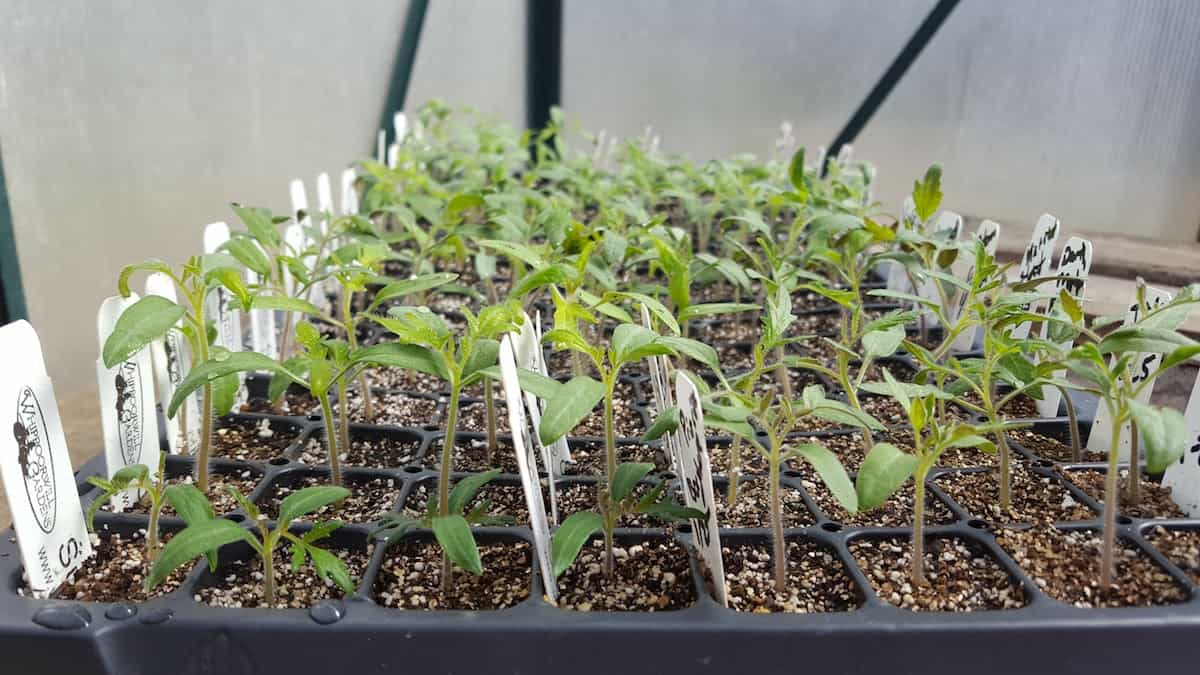
Caring for Tomato Seedlings
Once the tomato seeds have germinated, it's crucial to provide proper care to ensure healthy growth. This includes providing adequate light, water, and nutrients.
Light
Tomato seedlings need at least 14-16 hours of light per day. If you don't have access to a sunny window, use grow lights. Place the grow lights a few inches above the seedlings and adjust the height as they grow. Without adequate light, seedlings will become leggy and weak. Leggy seedlings are characterized by long, thin stems and small leaves. They are more susceptible to diseases and less likely to thrive when transplanted outdoors.
Water
Water tomato seedlings when the top inch of soil feels dry to the touch. Water gently to avoid disturbing the roots. Avoid overwatering, which can lead to root rot. Root rot is a fungal disease that can kill seedlings. Signs of root rot include wilting, yellowing leaves, and a foul odor.
Nutrients
Once the seedlings have developed their first set of true leaves (the leaves that appear after the initial seed leaves), start fertilizing them with a diluted liquid fertilizer. Use a balanced fertilizer with a ratio of 10-10-10 or a fertilizer specifically formulated for seedlings. Follow the instructions on the fertilizer label for dilution rates.
Thinning Seedlings
If you planted multiple seeds in each cell, you'll need to thin them out once they have a few true leaves. Select the strongest seedling in each cell and carefully snip off the others at the soil line. Avoid pulling out the unwanted seedlings, as this can damage the roots of the remaining seedling.
Hardening Off Seedlings
Before transplanting your tomato seedlings outdoors, it's essential to harden them off. Hardening off is the process of gradually acclimating the seedlings to outdoor conditions. This process is critical to prevent transplant shock. Transplant shock occurs when seedlings are suddenly exposed to the harsh outdoor environment, resulting in stunted growth or even death.
Start by placing the seedlings outdoors in a sheltered location for a few hours each day, gradually increasing the amount of time they spend outside over the course of a week or two. Protect them from direct sunlight and strong winds. Also, it's crucial to be aware of the temperature during hardening off. Bring them back indoors if the temperature drops below 50°F (10°C) or if there is a risk of frost.
Transplanting Tomato Seedlings Outdoors
Once the danger of frost has passed and the soil has warmed up, it's time to transplant your tomato seedlings outdoors. Choose a sunny location with well-drained soil. Before transplanting, amend the soil with compost or other organic matter to improve its fertility and drainage. Dig a hole that is slightly larger than the root ball of the seedling. Carefully remove the seedling from its container and place it in the hole. Backfill the hole with soil and gently firm it around the base of the plant.
Space tomato plants 2-3 feet apart, depending on the variety. Determinate varieties can be spaced closer together than indeterminate varieties. Water the transplanted seedlings thoroughly and provide support, such as stakes or cages, for indeterminate varieties.
Troubleshooting Common Problems
Even with the best care, you may encounter some common problems when starting tomato seeds indoors. Here are a few troubleshooting tips:
Damping off: Prevent damping off by using a sterile seed starting mix, avoiding overwatering, and providing good air circulation. If damping off occurs, remove the affected seedlings immediately. Leggy seedlings: Provide adequate light and lower the temperature to prevent leggy seedlings. Yellowing leaves: Yellowing leaves can indicate a nutrient deficiency, overwatering, or underwatering. Adjust your watering and fertilizing practices accordingly. Pests: Monitor seedlings for pests, such as aphids or spider mites. Treat infestations with insecticidal soap or neem oil.
Conclusion: The Best Way to Plant Tomato Seeds Indoors
By following these guidelines, you can successfully plant tomato seeds indoors and enjoy a bountiful harvest of homegrown tomatoes. Starting tomato seeds indoors is a rewarding experience that allows you to extend the growing season and control the growing environment. With a little planning and effort, you can enjoy the delicious taste of homegrown tomatoes, even when it's cold outside!