Are you dreaming of juicy, sun-ripened tomatoes bursting with flavor, but lack the space or the time for a traditional garden? Or perhaps you're tired of constantly worrying about whether your tomato plants are getting enough water? Then, the world of self-watering containers might just be your gardening salvation! Let's dive in and explore how you can grow amazing tomatoes using this clever and convenient method. The Magic of Self Watering Containers for Tomato Plants Self-watering containers, sometimes called sub-irrigated planters (SIPs), are designed to provide a consistent and reliable water supply to your plants, minimizing the need for frequent watering and dramatically reducing water waste. For tomato plants, which are known for their thirstiness, this can be a game-changer! The beauty of a tomato plant self watering container lies in its simplicity and efficiency. It essentially creates a mini-reservoir beneath the soil, allowing the plant...
Ever dreamt of having a never-ending supply of juicy, homegrown tomatoes right from your backyard? The good news is, you don't need to buy seeds every year! You can actually grow a tomato plant directly from a tomato. It sounds crazy, I know, but it's totally doable and a super fun experiment for gardeners of all levels. Let's dive into how you can achieve this and enjoy the satisfaction of nurturing new life from something you already have!
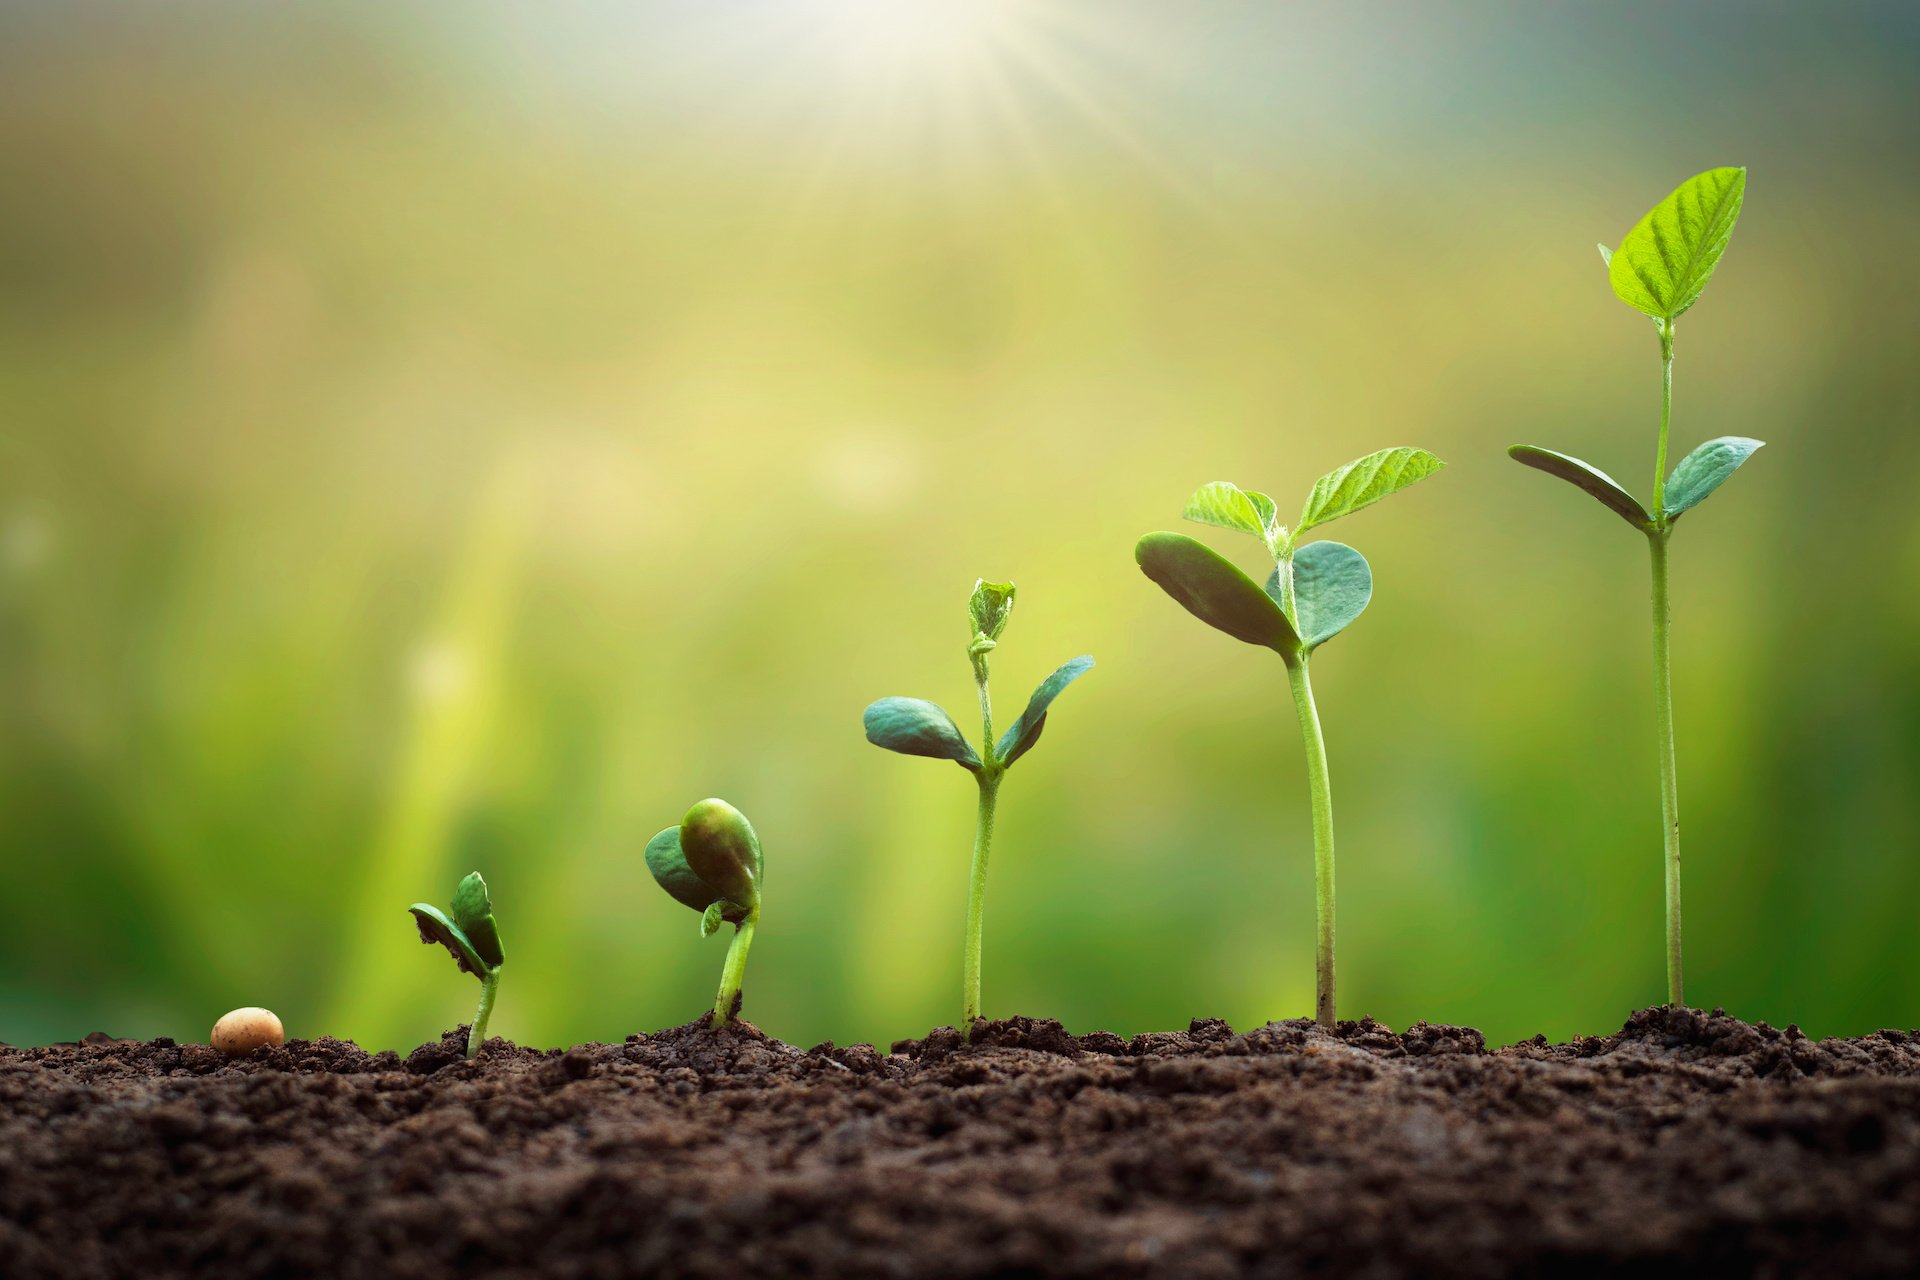
Growing Tomato Plants From Tomatoes: A Step-by-Step Guide
Growing a tomato plant from a tomato isn't the most conventional method, but it's a fantastic way to understand the plant life cycle and save on seed costs. It's a simple process that yields exciting results. You'll be amazed at how easily you can propagate new tomato plants from your existing fruits. This guide provides a detailed walkthrough of each step, ensuring you have the best chance of success.
Choosing The Right Tomato
The success of growing tomato plants from tomatoes heavily relies on choosing the right starting tomato. Not all tomatoes are created equal when it comes to propagation. Here's what to look for:
Heirloom Varieties are Key
Heirloom tomatoesare your best bet. These varieties are open-pollinated, meaning their seeds will produce plants that are true to the parent plant. Hybrids, on the other hand, might not grow true to type, and the resulting plants might not produce the same quality or type of fruit. Some popular and reliable heirloom varieties for propagation include:
- Brandywine: Known for its large, beefsteak-type fruit and rich flavor.
- Cherokee Purple: A dusky rose-colored tomato with a complex, slightly smoky taste.
- San Marzano: A classic Italian plum tomato perfect for sauces and pastes.
- Roma: Although technically a hybrid, this plant is quite stable and easily grown.
Opt For Ripe, Organic Tomatoes
Always select tomatoes that arefully ripe or even slightly overripe. This indicates that the seeds inside are mature enough to germinate. Organic tomatoes are preferable because they haven't been treated with chemicals that could inhibit germination. Plus, you'll be starting with a healthier plant!
Avoid Store-Bought Hybrids
As mentioned earlier, store-bought hybrid tomatoes are less likely to produce reliable results. The seeds might not be viable, or the resulting plants might not yield the same quality of fruit as the parent tomato. It's best to source your tomatoes from a local farmer's market or a friend's garden where you can confirm the variety and growing practices.
Extracting and Preparing The Seeds
Once you've chosen the perfect tomato, it's time to extract and prepare the seeds for planting. This step is crucial for ensuring successful germination.
Squeeze Out The Pulp
Cut your tomato in half and gently squeeze out the seeds and pulp into a small container, such as a glass jar or plastic cup. Add a small amount of water to the container (about half a cup) to help separate the seeds from the pulp.
Fermentation Process:A Secret to Success
This is the most important step for increased germination. Allow the mixture to ferment for 3-4 days at room temperature. You'll notice a layer of mold forming on top. This fermentation process breaks down the gelatinous coating around the seeds that inhibits germination. Stir the mixture daily to ensure even fermentation. You will know the fermentation process is complete when the seeds settle to the bottom of the jar and the pulpy mixture is on top and smells sour.
Why Fermentation Works:
- It mimics the natural decomposition process that occurs in the soil.
- It removes germination inhibitors from the seed coat.
- It helps to kill any seed-borne diseases.
Rinse and Dry The Seeds
After fermentation, rinse the seeds thoroughly under running water using a fine-mesh sieve or strainer. This removes the fermented pulp and any remaining gelatinous coating. Spread the rinsed seeds on a paper towel or coffee filter and let them dry completely for about a week in a cool, dry place. Make sure the seeds are fully dry before storing them, as any moisture can lead to mold growth.
Planting The Seeds
Now that your seeds are cleaned, dried, and ready, it's time to plant them.
Starting Seeds Indoors
Starting your tomato seeds indoors gives them a head start and protects them from harsh weather conditions. Here's what you'll need:
- Seed starting trays or small pots
- Seed starting mix (a sterile, well-draining potting mix)
- Watering can or spray bottle
- Warm location (70-80°F)
- Grow lights (optional but recommended)
Fill your seed starting trays or pots with seed starting mix. Moisten the soil and then sow the seeds about ¼ inch deep. Gently cover the seeds with soil and water again. Keep the soil consistently moist but not waterlogged. Place the trays or pots in a warm location. Using grow lights will help the seedlings establish and grow faster. If you do not use grow lights, find a sunny location.
Consider using anindoor garden system to streamline the process. TheAhopegarden Indoor Garden Hydroponics Growing System: 10 Pods Plant Germination Kit Aeroponic Herb Vegetable Growth Lamp Countertop with LED Grow Light is an excellent option. You can find this high-quality device on Amazon here: https://amzn.to/3RPpa Sk. With an indoor gardening setup like this, you can effortlessly nurture your tomatoes from seeds to seedlings, ensuring a healthy start, and then transplant outdoors.
Transplanting Seedlings
Once your seedlings have developed their first set of true leaves (the leaves that appear after the initial seed leaves), they are ready to be transplanted into larger pots. Gently remove the seedlings from their starting trays or pots, being careful not to damage the roots. Transplant them into individual pots filled with potting mix. Continue to provide them with plenty of light and water.
Once the weather has warmed up and the risk of frost has passed, your seedlings can be transplanted outdoors. Choose a sunny location with well-draining soil. Dig a hole that is large enough to accommodate the root ball of the seedling. Gently remove the seedling from its pot and place it in the hole. Backfill the hole with soil and water thoroughly.
Caring For Your Tomato Plants
Proper care is essential for healthy tomato plants and a bountiful harvest.
Watering
Tomato plants need consistent watering, especially during hot weather. Water deeply and regularly, aiming for about 1-2 inches of water per week. Avoid overhead watering, as this can lead to fungal diseases. Water at the base of the plant to keep the foliage dry. Consider using drip irrigation or soaker hoses for efficient watering.
Fertilizing
Tomato plants are heavy feeders and require regular fertilization. Use a balanced fertilizer (such as 10-10-10) when planting and then fertilize every 2-3 weeks with a tomato-specific fertilizer. Look for fertilizers that are rich in phosphorus and potassium, which are essential for fruit development.
Pruning
Pruning tomato plants can improve air circulation, reduce disease, and promote fruit production. Remove suckers (the small shoots that grow between the main stem and branches) to encourage the plant to focus its energy on fruit development. Prune away any yellow or diseased leaves to prevent the spread of disease.
Support
Tomato plants, especially indeterminate varieties (those that continue to grow throughout the season), need support to prevent them from falling over. Use stakes, cages, or trellises to support your plants. This will also keep the fruit off the ground, reducing the risk of rot and pest damage.
Troubleshooting Common Issues
Even with the best care, tomato plants can sometimes encounter problems. Here are some common issues and how to address them:
Blossom End Rot
Blossom end rot is a condition where the bottom of the tomato develops a dark, sunken, leathery spot. This is caused by a calcium deficiency, often due to inconsistent watering. Ensure consistent watering and add calcium to the soil by using bone meal or crushed eggshells.
Tomato Hornworms
Tomato hornworms are large, green caterpillars that can quickly defoliate tomato plants. Handpick them off the plants or use Bacillus thuringiensis (Bt), a natural insecticide that is safe for humans and beneficial insects.
Early Blight
Early blight is a fungal disease that causes dark spots on the leaves and stems of tomato plants. Remove and destroy infected leaves, improve air circulation, and apply a fungicide if necessary.
Harvesting and Enjoying Your Tomatoes
Congratulations! You've successfully grown tomato plants from tomatoes. Harvesting your own homegrown tomatoes is one of the most rewarding parts of gardening.
Knowing When To Harvest
Tomatoes are ready to harvest when they are fully colored, slightly soft to the touch, and easily detach from the vine. The color will depend on the variety you're growing.
Storing Your Tomatoes
Store your harvested tomatoes at room temperature, out of direct sunlight. Avoid refrigerating them, as this can affect their flavor and texture. If you have a surplus of tomatoes, you can preserve them by canning, freezing, or drying.
Growing tomato plants from tomatoes is a fun and rewarding way to experience the magic of gardening. It's a sustainable practice that saves you money and connects you more deeply with the natural world. So, go ahead, give it a try and enjoy the taste of homegrown goodness!