Are you dreaming of juicy, sun-ripened tomatoes bursting with flavor, but lack the space or the time for a traditional garden? Or perhaps you're tired of constantly worrying about whether your tomato plants are getting enough water? Then, the world of self-watering containers might just be your gardening salvation! Let's dive in and explore how you can grow amazing tomatoes using this clever and convenient method. The Magic of Self Watering Containers for Tomato Plants Self-watering containers, sometimes called sub-irrigated planters (SIPs), are designed to provide a consistent and reliable water supply to your plants, minimizing the need for frequent watering and dramatically reducing water waste. For tomato plants, which are known for their thirstiness, this can be a game-changer! The beauty of a tomato plant self watering container lies in its simplicity and efficiency. It essentially creates a mini-reservoir beneath the soil, allowing the plant...
There's nothing quite like the taste of a sun-ripened, juicy tomato fresh from your own garden. And the satisfaction of growing them yourself? Unbeatable! But what if you don't have fancy grow lights or a greenhouse? Don't worry, you can still nurture those tiny seeds into thriving tomato plants. Let's explore how to grow tomatoes from seeds without grow lights, bringing that garden-fresh flavor to your table even if you're limited on resources.
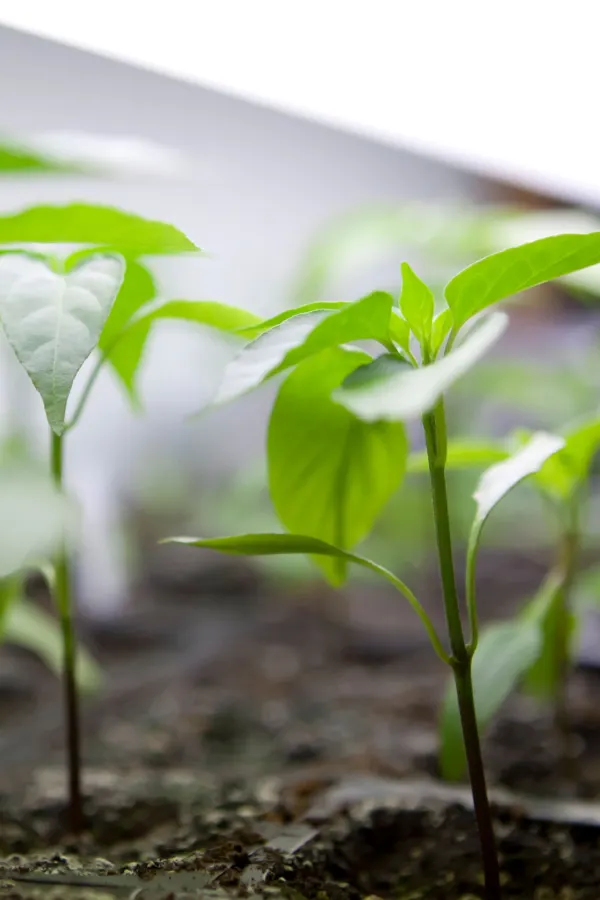
Starting Tomatoes from Seed Without Artificial Lights
Growing tomatoes from seed can seem daunting at first, especially when you factor in the need for light. Commercial growers often rely on powerful grow lights to ensure strong, healthy seedlings. But the good news is, with the right approach, you can successfully start your tomato plants without them. The key lies in timing, location, and providing the best possible conditions for natural sunlight to do its job. We will discuss everything you need to know about starting tomato seeds without using artificial grow lights.
Timing is Everything
One of the most critical factors in successfully starting tomato seeds without grow lights is timing. Tomatoes need a long growing season, typically requiring 6-8 weeks indoors before they can be transplanted outside. However, without the consistent intensity of artificial light, your seedlings will be more vulnerable to becoming leggy and weak if started too early. Consider this example. In many regions of the United States, the last frost date falls sometime in April or May. If this is the case for you, it's best to start your tomato seeds indoors approximately 6 weeks before this date. So, if your last frost date is May 1st, aim to sow your seeds around mid-March. This will give your seedlings enough time to develop before being moved outdoors, maximizing their exposure to natural sunlight when they need it most.
Refer to your local extension office or online resources to determine the average last frost date for your area. This will be your guiding point for determining when to sow those tomato seeds.
Choosing the Right Location
Sunlight is essential for plant growth, and your seedlings will need as much of it as they can get. Choosing the right location within your home is therefore critical for starting tomatoes without grow lights. Ideally, you want a south-facing window. This will provide the most direct sunlight throughout the day. East-facing windows can also work, providing good morning light, but west-facing windows, while offering afternoon sun, can sometimes get too hot and scorch young seedlings.
Here are some factors to consider when choosing a location:
- Sunlight Duration: Aim for at least 6-8 hours of direct sunlight per day.
- Temperature: Maintain a consistent temperature between 70-75°F (21-24°C) for optimal germination. Once seedlings emerge, slightly cooler temperatures (65-70°F or 18-21°C) are ideal.
- Drafts: Avoid placing seedlings near drafty windows or doors, as this can stress them.
- Reflection: Consider using reflective surfaces, such as aluminum foil or white boards, to bounce more light onto your seedlings.
If you find that your window doesn't provide enough direct sunlight, you can supplement with indirect light from other windows or even strategically placed mirrors. Rotate your seedlings regularly, ideally once a day, to ensure even light exposure and prevent them from leaning towards the light source.
Starting Your Seeds
Now that you've considered timing and location, let's dive into the actual process of starting your seeds. It's actually a really simple process if done right. But it is important to not skip any steps!
Choosing the Right Soil and Containers
Your soil plays a critical role in the success of your seedlings. You'll want to use a seed-starting mix, which is specifically formulated to provide the right drainage and nutrients for young plants. Avoid using garden soil, as it can be too heavy and may contain pathogens that can harm your seedlings.
Here are some tips regarding soil: Choose a lightweight mix. This allows for good drainage and aeration. Consider a soilless mix. These mixes, made from peat moss, vermiculite, and perlite, are sterile and provide excellent drainage. Don't over-compact the soil. Gently fill your containers, and lightly tap them to settle the soil. Compacting it too much can hinder root growth.
Your containers should also provide adequate drainage. Seed trays with individual cells or small pots (2-3 inches in diameter) work well. Make sure they have drainage holes to prevent waterlogging, which can lead to root rot. Consider also using peat pots as this allows you to easily transplant your plants to bigger containers without disturbing their roots.
Sowing Your Seeds
Moisten the seed-starting mix before filling your containers. Sow the tomato seeds about ¼ inch deep, and gently cover them with soil. Water lightly using a spray bottle to avoid disturbing the seeds. Cover the containers with a clear plastic lid or plastic wrap to create a humid environment, which will aid germination. Place the containers in a warm location (70-75°F or 21-24°C) until the seeds germinate, which typically takes 5-10 days.
Once the seedlings emerge, remove the plastic cover and move them to your chosen sunny location. Continue to water them regularly, keeping the soil moist but not waterlogged. You can use a liquid fertilizer diluted to half strength to provide additional nutrients once the seedlings have developed their first set of true leaves (the second set of leaves that appear after the initial seed leaves).
Preventing Leggy Seedlings
One of the biggest challenges of starting tomatoes without grow lights is preventing leggy seedlings. Leggy seedlings are tall, spindly, and weak, making them more susceptible to disease and less likely to thrive when transplanted. This is caused by lack of enough light so the seedlings stretch upwards to get more light. Here's how to minimize the risk:
- Provide Maximum Light: As mentioned earlier, choose the sunniest location possible and rotate your seedlings regularly.
- Cooler Temperatures: Slightly cooler temperatures (65-70°F or 18-21°C) can help slow down growth and prevent legginess.
- Air Circulation: Ensure good air circulation around your seedlings, using a small fan if necessary. This helps strengthen their stems.
- Harden Off: Before transplanting your seedlings outdoors, gradually acclimate them to the outdoor environment over a period of 1-2 weeks. This process, known as "hardening off," helps them adjust to the stronger sunlight, wind, and temperature fluctuations.
If your seedlings do become leggy, don't despair! You can still salvage them by transplanting them into larger containers, burying the stems deeper in the soil. Tomatoes will develop roots along the buried stem, creating a stronger, more robust plant.
Transplanting Your Seedlings
Once the danger of frost has passed and your seedlings have been hardened off, it's time to transplant them into your garden. Choose a sunny location with well-drained soil. Dig a hole large enough to accommodate the root ball, and gently remove the seedling from its container. If your seedlings are leggy, as mentioned before, you can bury the stem deeper, leaving only the top few sets of leaves above the soil. This will encourage root development and create a stronger plant.
Water the transplanted seedlings thoroughly, and provide support, such as stakes or cages, to help them grow upright. Mulch around the plants to retain moisture and suppress weeds. With proper care and attention, your tomato plants will soon be producing delicious, homegrown tomatoes!
Troubleshooting Common Problems
Even with the best efforts, you may encounter some challenges when starting tomatoes from seeds without grow lights. Here are a few common problems and how to address them:
- Damping Off: This fungal disease can cause seedlings to rot and die. Prevent it by using a sterile seed-starting mix, providing good air circulation, and avoiding overwatering.
- Nutrient Deficiencies: Yellowing leaves can indicate a nutrient deficiency. Use a liquid fertilizer diluted to half strength to provide the necessary nutrients.
- Pests: Aphids and other pests can attack young seedlings. Inspect your plants regularly and treat any infestations with insecticidal soap or neem oil.
Growing tomatoes from seed without grow lights requires a bit of patience and attention to detail, but it's definitely achievable. By following these tips and providing the best possible conditions for your seedlings, you can enjoy a bountiful harvest of homegrown tomatoes without breaking the bank on expensive equipment.
Looking for a more controlled environment, even without relying solely on natural light? You might find an indoor hydroponics system helpful. For instance, the possibilities are endless with an aeroponic herb garden, like the Ahopegarden Indoor Garden Hydroponics Growing System. It's a 10-pod plant germination kit that could give your herbs and vegetables a great start, with its own LED grow light to supplement natural sunlight!