Are you dreaming of juicy, sun-ripened tomatoes bursting with flavor, but lack the space or the time for a traditional garden? Or perhaps you're tired of constantly worrying about whether your tomato plants are getting enough water? Then, the world of self-watering containers might just be your gardening salvation! Let's dive in and explore how you can grow amazing tomatoes using this clever and convenient method. The Magic of Self Watering Containers for Tomato Plants Self-watering containers, sometimes called sub-irrigated planters (SIPs), are designed to provide a consistent and reliable water supply to your plants, minimizing the need for frequent watering and dramatically reducing water waste. For tomato plants, which are known for their thirstiness, this can be a game-changer! The beauty of a tomato plant self watering container lies in its simplicity and efficiency. It essentially creates a mini-reservoir beneath the soil, allowing the plant...
There's nothing quite like biting into a juicy, sun-ripened tomato fresh from your own garden. The taste is incomparable to anything you can buy in a store. The secret to unlocking that delicious flavor? Sowing tomato plants yourself! It might seem daunting at first, but with a little knowledge and a few simple steps, you'll be harvesting your own homegrown tomatoes in no time.
The Joy of Sowing Tomato Plants
Growing your own tomatoes from seed, or even starting with small seedlings, is an incredibly rewarding experience. Not only do you get to enjoy the fruits (or vegetables!) of your labor, but you also have complete control over the growing process. This means you can choose the specific varieties you love, avoid harmful pesticides, and nurture your plants from the very beginning.
When to Start Sowing Tomato Seeds
Timing is crucial when it comes to sowing tomato seeds. Tomatoes are warm-weather plants, meaning they need warm soil and plenty of sunshine to thrive. Starting your seeds indoors allows you to get a head start on the growing season. The ideal time to start sowing tomato seeds indoors is generally 6-8 weeks before the last expected frost in your area. This allows the seedlings to develop a strong root system before they're transplanted outdoors.
Here's a general guideline:
Early Spring (February-March): For regions with long growing seasons. Late Spring (April-May): For regions with shorter growing seasons.
You can find the average last frost date for your area by checking with your local agricultural extension office or online resources. Remember, it's always better to err on the side of caution and start your seeds a little later rather than too early.
Materials Needed for Sowing Tomato Seeds
Before you begin, gather all the necessary materials. Having everything on hand will make the process smoother and more enjoyable. Here's a list of essentials:
Tomato Seeds: Choose varieties that are well-suited to your climate and personal preferences. Consider factors like size, color, disease resistance, and taste. Seed Starting Mix: This is a sterile, lightweight mix specifically designed for starting seeds. Avoid using regular garden soil, as it can be too heavy and may contain pathogens. Seed Trays or Pots: You can use plastic seed trays, peat pots, or even recycled containers like yogurt cups. Make sure the containers have drainage holes. Watering Can or Spray Bottle: For gentle watering. Heat Mat (Optional): Provides bottom heat to speed up germination. Grow Lights (Optional): Provides consistent light for healthy seedling development, especially if you don't have a sunny windowsill. Labels:To keep track of which variety is planted in each tray or pot.
Using proper tools for germinating seeds, and growing is essential. For example, using an indoor garden system can help create the right environment. One of these is theAhopegarden Indoor Garden Hydroponics Growing System, which features a 10-pod plant germination kit and an LED grow light, making it perfect for nurturing your tomato seedlings indoors. Check it out here:https://amzn.to/3RPpa Sk.
Step-by-Step Guide to Sowing Tomato Seeds
Now that you have all your materials, let's get started with the sowing process:
Step 1: Prepare the Seed Starting Mix
Moisten the seed starting mix with water until it's evenly damp, but not soggy. You can do this in a bucket or bowl. The mix should clump together when squeezed, but not drip water.
Step 2: Fill the Seed Trays or Pots
Fill your seed trays or pots with the moistened seed starting mix, leaving about half an inch of space at the top. Gently press down the mix to remove any air pockets.
Step 3: Sow the Seeds
Sow the tomato seeds about ¼ inch deep into the seed starting mix. Place 2-3 seeds in each cell or pot. This ensures that at least one seed will germinate. If more than one seed germinates, you can thin them out later.
Step 4: Cover the Seeds
Lightly cover the seeds with a thin layer of seed starting mix. This helps to keep the seeds moist and prevents them from drying out.
Step 5: Water Gently
Water the seed trays or pots gently using a watering can or spray bottle. Avoid overwatering, as this can lead to damping off, a fungal disease that can kill seedlings.
Step 6: Provide Warmth and Light
Place the seed trays or pots in a warm location, ideally between 70-80°F (21-27°C). You can use a heat mat to provide bottom heat. If you don't have a heat mat, you can place the trays or pots in a warm room. Provide adequate light, either from a sunny windowsill or grow lights. If using a windowsill, rotate the trays or pots regularly to ensure that the seedlings receive even light on all sides. Grow lights should be positioned a few inches above the seedlings.
Step 7: Maintain Moisture
Keep the seed starting mix consistently moist, but not soggy. Check the moisture level daily and water as needed. Use a spray bottle to mist the surface of the soil if it starts to dry out.
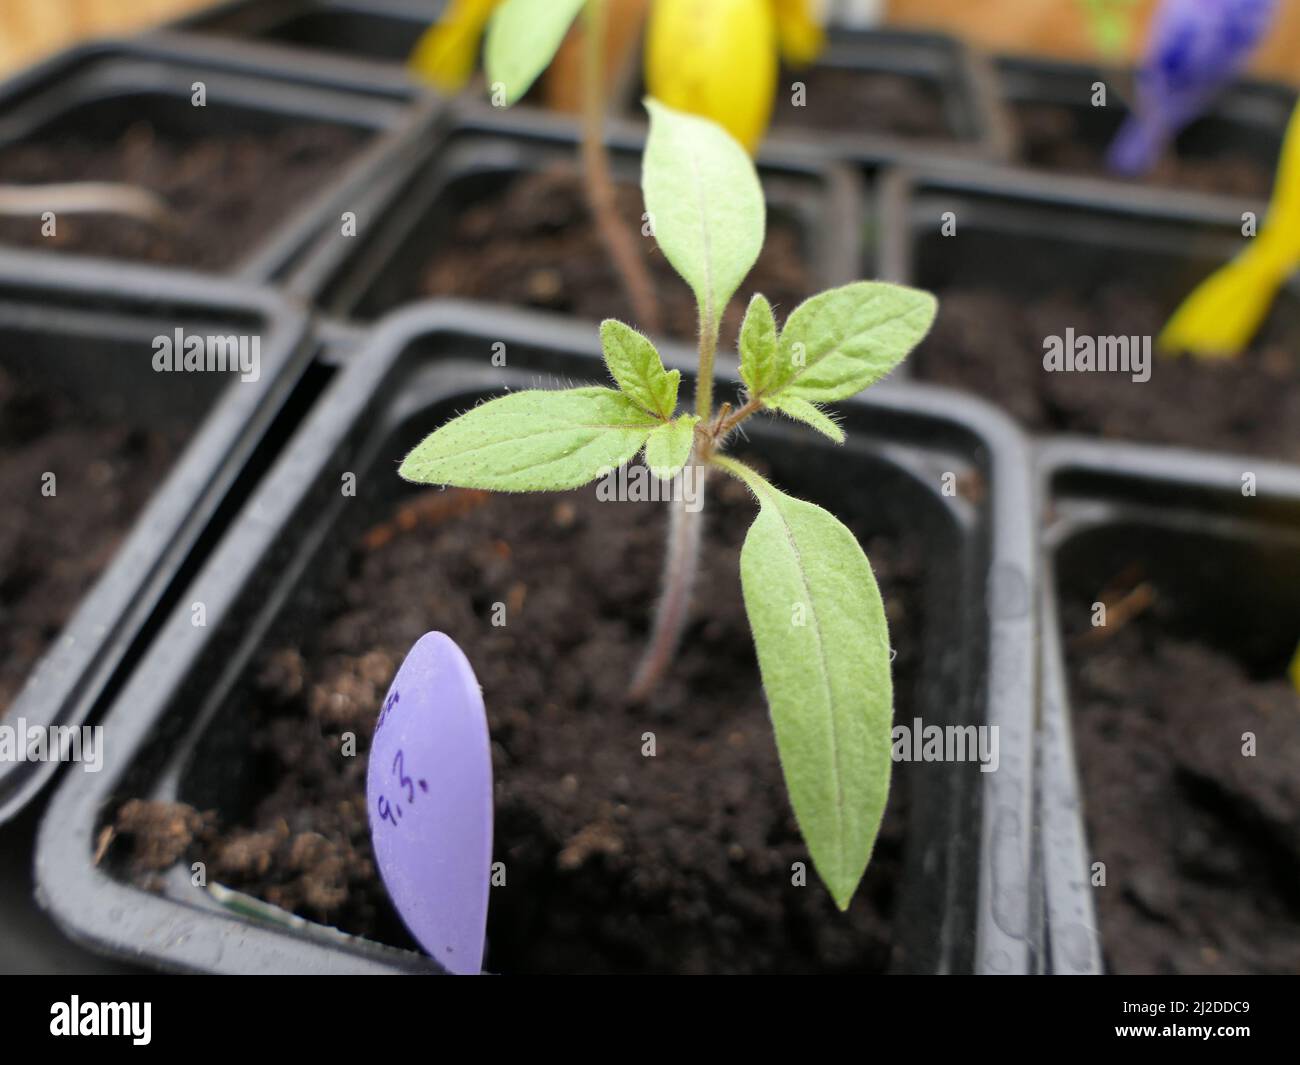
Caring for Tomato Seedlings After Germination
Once the seeds germinate, which usually takes 5-10 days, it's important to provide the seedlings with proper care to ensure they grow into healthy, strong plants.
Thinning Seedlings
If more than one seed germinated in each cell or pot, thin them out by snipping off the weaker seedlings at the soil line with a pair of scissors. Leave only the strongest seedling in each cell or pot.
Providing Adequate Light
Tomato seedlings need plenty of light to grow properly. If you're using a windowsill, make sure the seedlings are receiving at least 6 hours of direct sunlight per day. If you're using grow lights, keep them on for 14-16 hours per day.
Watering and Fertilizing
Water the seedlings regularly, allowing the soil to dry out slightly between waterings. Once the seedlings have developed their first set of true leaves (the leaves that look like miniature tomato leaves), you can start fertilizing them with a diluted liquid fertilizer. Follow the instructions on the fertilizer label.
Hardening Off Seedlings
Before transplanting the seedlings outdoors, it's important to harden them off. This process gradually acclimates the seedlings to outdoor conditions, making them less susceptible to shock. Start by placing the seedlings outdoors in a sheltered location for a few hours each day, gradually increasing the amount of time they spend outdoors over the course of a week or two. Protect the seedlings from direct sunlight and wind during the hardening off process.
Transplanting Tomato Seedlings Outdoors
Once the danger of frost has passed and the soil has warmed up, you can transplant your tomato seedlings outdoors. Choose a sunny location with well-drained soil. Dig a hole that is slightly larger than the root ball of the seedling. Gently remove the seedling from its pot or tray and place it in the hole. Backfill the hole with soil and water thoroughly.
Space tomato plants about 2-3 feet apart, depending on the variety. Taller varieties will need staking or caging for support.
Troubleshooting Common Problems When Sowing Tomato Plants
Even with the best planning, things can sometimes go wrong. Here are some common problems you might encounter when sowing tomato plants and how to address them:
Poor Germination: This could be due to old seeds, cold soil, or overly wet soil. Make sure to use fresh seeds and provide adequate warmth. Damping Off: This is a fungal disease that causes seedlings to rot at the soil line. Avoid overwatering and provide good air circulation. Leggy Seedlings: This is caused by insufficient light. Provide more light or move the seedlings closer to the light source. Yellowing Leaves: This could be due to nutrient deficiencies or overwatering. Fertilize the seedlings with a diluted liquid fertilizer and avoid overwatering.
Enjoy Your Homegrown Tomatoes!
Sowing tomato plants is a rewarding and enjoyable experience. With a little planning and care, you can grow your own delicious tomatoes right in your backyard. So, get started today and enjoy the taste of homegrown goodness!