Are you dreaming of juicy, sun-ripened tomatoes bursting with flavor, but lack the space or the time for a traditional garden? Or perhaps you're tired of constantly worrying about whether your tomato plants are getting enough water? Then, the world of self-watering containers might just be your gardening salvation! Let's dive in and explore how you can grow amazing tomatoes using this clever and convenient method. The Magic of Self Watering Containers for Tomato Plants Self-watering containers, sometimes called sub-irrigated planters (SIPs), are designed to provide a consistent and reliable water supply to your plants, minimizing the need for frequent watering and dramatically reducing water waste. For tomato plants, which are known for their thirstiness, this can be a game-changer! The beauty of a tomato plant self watering container lies in its simplicity and efficiency. It essentially creates a mini-reservoir beneath the soil, allowing the plant...
Imagine biting into a sun-warmed, juicy tomato fresh from your own garden. That vibrant flavor, the satisfaction of nurturing something from seed to table – it all starts with a tiny seed and a little bit of effort. Growing your own tomatoes is rewarding, and potting your tomato seeds correctly is the first and most important step toward a bountiful harvest. Let's dive into everything you need to know about successfully starting your tomato plants from seed!
The Importance of Potting Tomato Seeds Correctly
Potting tomato seeds might seem simple, but doing it right makes a huge difference in the health and eventual yield of your plants. Providing the optimal conditions from the start will give your seedlings a significant advantage, leading to stronger root systems, healthier foliage, and ultimately, more delicious tomatoes. Think of it like laying a strong foundation for a house – if the foundation is weak, the entire structure is compromised. The same goes for your tomato plants. Poor germination or weak seedlings can lead to stunted growth, increased susceptibility to diseases, and a disappointing harvest. So, taking the time to learn and implement the proper techniques for potting tomato seeds is an investment that will pay off handsomely in the end.
Choosing the Right Tomato Seeds
Before you even think about potting, you need to select the right tomato seeds for your garden and your preferences. Consider your local climate, the amount of sunlight your garden receives, and the type of tomatoes you enjoy eating. There are hundreds of varieties to choose from, each with its own unique characteristics. For example:
- Determinate tomatoes grow to a certain size and then produce all their fruit at once, making them ideal for canning or making sauce. Popular determinate varieties include Roma and Celebrity.
- Indeterminate tomatoes continue to grow and produce fruit throughout the growing season, providing a continuous harvest. Examples of indeterminate varieties are Beefsteak, Cherry, and Heirloom tomatoes.
Heirloom seeds are seeds that have been passed down through generations, often with unique flavors and characteristics. These tomatoes are known for their distinct tastes and colors, with varieties like Brandywine (pink beefsteak), Cherokee Purple (dusky pink/purple), and Green Zebra (striped green). Heirloom seeds require special care because of lower germination rate than other hybrid options. They are more vulnerable to diseases as well.
Hybrid seeds are created by cross-pollinating two different parent plants to combine desirable traits. They are generally more disease-resistant and produce higher yields than heirloom varieties. Some popular hybrid varieties include Big Boy, Early Girl, and Better Bush.
When choosing tomato seeds, look for reputable suppliers who offer high-quality seeds with good germination rates. Read reviews and descriptions carefully to select the varieties that are best suited for your growing conditions and taste preferences. Also, consider purchasing seeds that are labeled as disease-resistant, especially if you live in an area with common tomato diseases.
Gathering Your Supplies for Potting
Once you've chosen your tomato seeds, it's time to gather the necessary supplies for potting. Here's a checklist of what you'll need:
- Seed starting trays or small pots: Choose trays or pots that are at least 2 inches deep to allow for adequate root growth.
- Seed starting mix: Use a sterile, lightweight mix specifically formulated for starting seeds. This will provide good drainage and aeration.
- Watering can or spray bottle: Use a gentle source of water to avoid disturbing the seeds.
- Heat mat (optional): A heat mat can help to speed up germination by providing consistent warmth.
- Grow light (optional): If you don't have a sunny window, a grow light will provide the necessary light for your seedlings.
- Labels and a marker: Label each tray or pot with the tomato variety and the date you planted the seeds.
It's crucial to use a seed starting mix rather than regular potting soil because it's specifically formulated to be lightweight and well-draining. This allows the delicate roots of the seedlings to grow easily and prevents them from becoming waterlogged. Regular potting soil can be too heavy and dense, which can lead to poor germination and root rot.
The Step-by-Step Guide to Potting Tomato Seeds
Now that you have your supplies, let's get down to the actual process of potting tomato seeds. Here's a step-by-step guide to ensure success:
Preparing the Seed Starting Trays or Pots
Fill your seed starting trays or pots with the seed starting mix. Gently press down on the mix to compact it slightly, but avoid packing it too tightly. Leave about half an inch of space at the top of each tray or pot.
Sowing the Tomato Seeds
Tomato seeds are small, so you only need to sow a few seeds in each cell or pot. Place 2-3 seeds on top of the soil in each cell or pot. Then, cover the seeds with a thin layer of seed starting mix, about 1/4 inch deep. Gently pat down the soil to ensure good contact between the seeds and the mix.
Watering the Seeds
After sowing the seeds, gently water them using a watering can or spray bottle. The goal is to moisten the soil without dislodging the seeds. Water slowly and evenly until the soil is thoroughly moistened.
Providing Warmth and Light
Tomato seeds germinate best in warm conditions, ideally between 70-80°F (21-27°C). If you're using a heat mat, place the seed starting trays or pots on the mat. If you don't have a heat mat, place them in a warm location, such as near a radiator or on top of a refrigerator.
Tomato seedlings also need plenty of light to grow properly. If you're growing them indoors, place them under a grow light or in a sunny window that receives at least 6 hours of direct sunlight per day. If you're using a grow light, keep it about 2-4 inches above the seedlings.
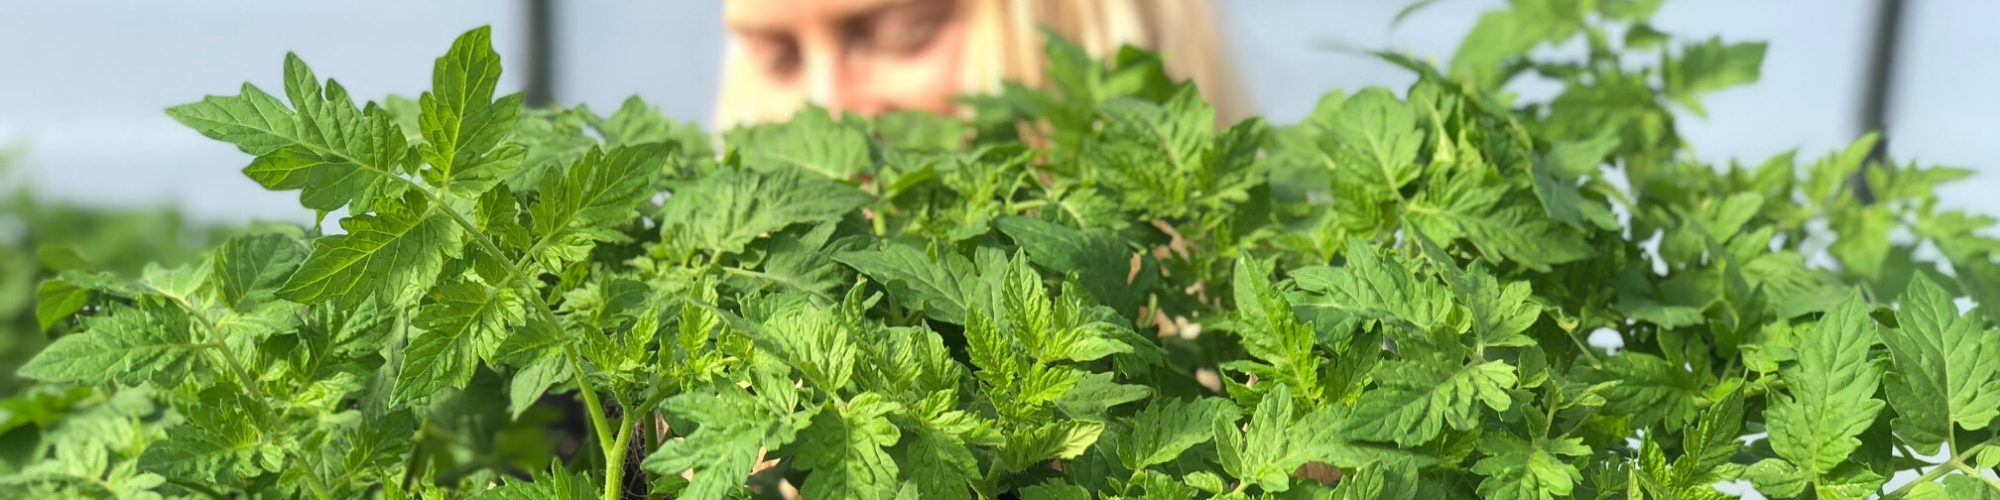
Caring for Your Tomato Seedlings
Once your tomato seeds have germinated, it's important to provide proper care to ensure that they grow into strong, healthy plants. Here are some key tips:
Watering
Water your tomato seedlings regularly to keep the soil consistently moist, but not waterlogged. Allow the top inch of soil to dry out slightly between waterings. Overwatering can lead to root rot, while underwatering can stunt growth.
Thinning
If you planted multiple seeds in each cell or pot, you'll need to thin them out once they have developed their first true leaves (the leaves that appear after the initial seed leaves). Choose the strongest seedling in each cell or pot and carefully snip off the others at the soil level using scissors or small pruners. This will prevent overcrowding and allow the remaining seedling to thrive.
Fertilizing
Once your tomato seedlings have developed their first true leaves, you can start feeding them with a diluted fertilizer. Use a balanced fertilizer, such as a 20-20-20, diluted to half strength. Fertilize every 1-2 weeks, following the instructions on the fertilizer label.
Hardening Off
Before transplanting your tomato seedlings outdoors, you'll need to harden them off to acclimate them to the outdoor conditions. This involves gradually exposing them to sunlight, wind, and temperature fluctuations over a period of 1-2 weeks. Start by placing the seedlings outdoors in a sheltered location for a few hours each day, gradually increasing the amount of time they spend outdoors. This process is important because it strengthens the seedlings and reduces the risk of transplant shock.
Troubleshooting Common Problems
Even with the best care, you may encounter some common problems when growing tomato seedlings. Here are a few issues to watch out for:
- Damping off: This is a fungal disease that causes seedlings to collapse and die. It's often caused by overwatering or poor ventilation. To prevent damping off, use a sterile seed starting mix, avoid overwatering, and ensure good air circulation.
- Leggy seedlings: These are seedlings that are tall and spindly with weak stems. They're often caused by insufficient light. To prevent leggy seedlings, provide plenty of light and keep the grow light close to the plants.
- Yellowing leaves: This can be caused by a variety of factors, including nutrient deficiencies, overwatering, or underwatering. Check the soil moisture and nutrient levels to determine the cause and adjust accordingly.
By understanding these common problems and how to address them, you can ensure that your tomato seedlings stay healthy and strong.
Transplanting Your Tomato Seedlings
Once your tomato seedlings are about 6-8 inches tall and the weather is warm enough, it's time to transplant them outdoors into your garden. Choose a sunny location with well-drained soil. Dig a hole that is slightly larger than the root ball of the seedling. Gently remove the seedling from its pot or tray and place it in the hole. Backfill with soil and water thoroughly. Space the plants about 2-3 feet apart, depending on the variety.
Many gardeners like to plant their tomato seedlings deep, burying the stem up to the first set of leaves. This encourages the plant to develop roots along the buried stem, resulting in a stronger, more robust plant. Just be sure to remove any leaves from the stem that will be buried in the soil.
After transplanting, water your tomato plants regularly and fertilize them as needed. Provide support for the plants using stakes or cages to prevent them from falling over as they grow and produce fruit.
Starting with strong and healthy seedlings is the key to getting the most out of your transplant and grow a full bountiful harvest of tomatoes!
Alternative Methods for Starting Tomato Seeds
While seed starting trays and pots are the most common method for starting tomato seeds, there are other options to consider. Here are a few alternative methods:
Paper Towel Method
This method involves germinating the seeds between damp paper towels before transferring them to soil. Simply place the seeds between two damp paper towels, place them in a plastic bag, and keep them in a warm location. Once the seeds have sprouted, carefully transfer them to small pots filled with seed starting mix.
Hydroponics
Hydroponics is a method of growing plants without soil, using nutrient-rich water solutions. This method can be used to start tomato seeds indoors, providing a controlled environment for optimal growth. For those interested in trying this method, something like theAhopegarden Indoor Garden Hydroponics Growing System might be a great place to start. This10-pod plant germination kit uses aeroponics and comes with a growth lamp, allowing you to easily cultivate herbs and vegetables like lettuce right on your countertop. It's a fantastic option for year-round growing, regardless of the weather outside! Check it out here: https://amzn.to/3RPpa Sk
Direct Sowing
In areas with long growing seasons, you can directly sow tomato seeds into the garden after the last frost. This method is less common because it can be difficult to control the germination conditions and protect the seedlings from pests and diseases. However, it can be a viable option for experienced gardeners.
Conclusion
Potting tomato seeds is a simple yet crucial step in growing your own delicious tomatoes. By following these tips and techniques, you can ensure that your tomato seedlings get off to a strong start, leading to a bountiful harvest. With a little bit of patience and care, you'll be enjoying homegrown tomatoes in no time! Happy gardening!