Are you dreaming of juicy, sun-ripened tomatoes bursting with flavor, but lack the space or the time for a traditional garden? Or perhaps you're tired of constantly worrying about whether your tomato plants are getting enough water? Then, the world of self-watering containers might just be your gardening salvation! Let's dive in and explore how you can grow amazing tomatoes using this clever and convenient method. The Magic of Self Watering Containers for Tomato Plants Self-watering containers, sometimes called sub-irrigated planters (SIPs), are designed to provide a consistent and reliable water supply to your plants, minimizing the need for frequent watering and dramatically reducing water waste. For tomato plants, which are known for their thirstiness, this can be a game-changer! The beauty of a tomato plant self watering container lies in its simplicity and efficiency. It essentially creates a mini-reservoir beneath the soil, allowing the plant...
Imagine biting into a juicy, sun-ripened tomato bursting with flavor – a flavor so intense, it takes you right back to summer. Now, what if I told you that you could experience that taste, that freshness, by starting your own tomato plants directly from fresh seeds? It might sound a bit daunting, but trust me, it's a rewarding journey that's easier than you think. Let's dive into the secrets of successfullyplanting tomatoes from fresh seeds.
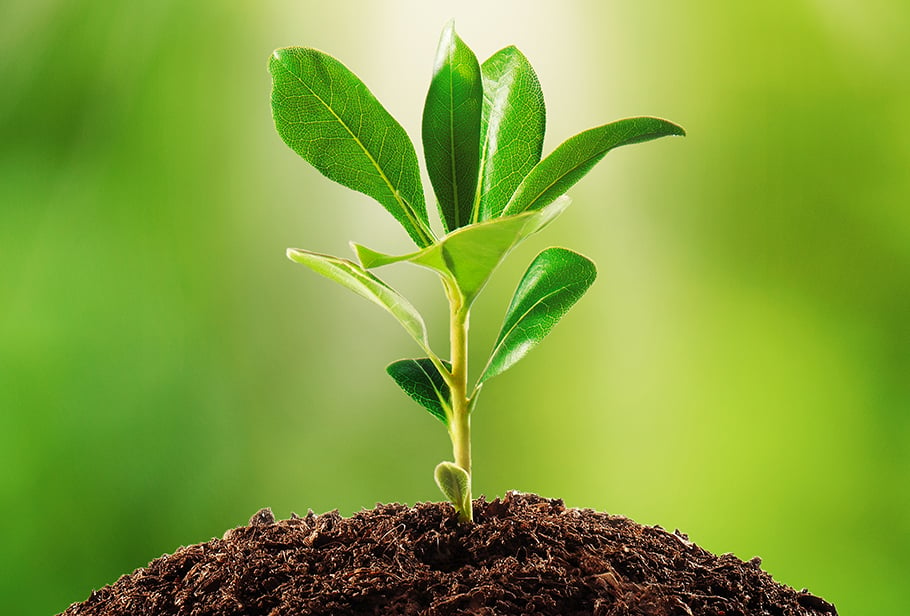
Why Plant Tomatoes From Fresh Seeds?
Okay, so why go through the trouble of starting tomatoes from fresh seeds when you can just buy seedlings from a nursery? There are several compelling reasons. First and foremost, you gain complete control over the variety. Nurseries often carry a limited selection, but when you use fresh seeds, you can explore a vast world of heirloom tomatoes, each with its unique flavor profile, size, and color. Think Brandywine, Cherokee Purple, San Marzano – the possibilities are endless! Furthermore, planting from fresh seeds often results in stronger, healthier plants because they haven't been subjected to the stress of transplanting multiple times. You're giving them the best possible start in life, acclimatizing them to your specific growing conditions right from the get-go. Plus, let's be honest, there's something incredibly satisfying about nurturing a plant from its very beginning, watching it grow from a tiny seed into a thriving, fruit-bearing powerhouse. Finally, saving fresh tomato seeds from your best tomatoes ensures the next year's crop is just as delicious, and adapted to your specific climate. You can start saving these seeds for your own tomato plant.
The Advantages of Using Fresh Tomato Seeds
Delving deeper into the benefits, using fresh tomato seeds provides certain unique advantages over older seeds. While properly stored dry seeds can remain viable for several years,freshly harvested seeds often exhibit a higher germination rate and seedling vigor. This means a greater percentage of your seeds will sprout, and the resulting seedlings will be stronger and faster growing. Here's a comparison:
- Germination Rate: Fresh seeds typically have a 80-95% germination rate, while older seeds may decline to 50-70% or lower.
- Seedling Vigor: Seedlings from fresh seeds tend to grow faster and develop stronger root systems, making them more resistant to disease and pests.
- Adaptation: Using seeds from tomatoes grown in your own garden helps select for plants that are best adapted to your local climate and soil conditions. This can lead to higher yields and more flavorful fruit over time.
Keep in mind that "fresh" in this context doesn't necessarily mean the moment you scoop the seeds out of the tomato. It refers to seeds that are relatively recent (within the past year) and have been properly processed and stored.
How to Extract Fresh Tomato Seeds for Planting
This is where the magic begins! Extracting fresh tomato seeds is a surprisingly simple process, but it's important to do it correctly to ensure healthy, viable seeds. Here’s a step-by-step guide:
- Select Ripe Tomatoes: Choose fully ripe, healthy tomatoes from your best-performing plants. The tomatoes should be free from blemishes or signs of disease.
- Scoop Out the Seeds: Cut the tomato in half and scoop out the seeds and surrounding pulp into a jar or container. Add a little water to the mixture.
- Fermentation Process (Important!): This is the key to removing the germination-inhibiting gel surrounding the seeds and preventing diseases. Let the mixture ferment for 3-4 days, stirring daily. You'll notice a layer of mold forming on top – this is normal. The mixture will also start to smell a bit funky, but don't worry, it's a good sign!
- Rinse and Separate the Seeds: Once the fermentation process is complete, add water to the jar and stir vigorously. The good seeds will sink to the bottom, while the pulp and non-viable seeds will float to the top. Pour off the pulp and floating seeds, and repeat the rinsing process until you have clean seeds at the bottom of the jar.
- Dry the Seeds: Spread the seeds out in a single layer on a paper towel or coffee filter and let them air dry for 1-2 weeks. Make sure they are completely dry before storing them.
- Store the Seeds: Once the seeds are dry, store them in an airtight container in a cool, dark, and dry place. A refrigerator or freezer is ideal for long-term storage.
The Importance of Fermentation in Seed Extraction
Many gardeners skip the fermentation step, but it's crucial for several reasons. The gelatinous sac that surrounds the tomato seeds contains germination inhibitors, preventing them from sprouting prematurely inside the tomato. Fermentation breaks down this sac, allowing the seeds to germinate easily when you plant them. Furthermore, fermentation helps to kill certain seed-borne diseases, ensuring that your seedlings are healthy and disease-free from the start. Without fermentation, seeds might have lower germination rates and be more susceptible to diseases. Some resources argue that a 10% bleach soak also works for sanitation, but it is not as good for germination as proper fermentation.
Planting Tomato Seeds: A Step-by-Step Guide
Now that you have your fresh, extracted, and dried tomato seeds, it's time to get planting! Here’s a comprehensive guide to ensure successful germination and healthy seedling development:
- Timing is Key: Start your tomato seeds indoors 6-8 weeks before the last expected frost in your area. This will give your seedlings enough time to grow strong and healthy before transplanting them outdoors. You can find your last frost date by searching online for your specific region or consulting with your local agricultural extension office.
- Choosing the Right Medium: Use a sterile seed-starting mix. This type of mix is specifically formulated to provide good drainage and aeration, which are essential for seed germination. Avoid using garden soil, as it may contain disease pathogens and weed seeds.
- Sowing the Seeds: Fill your seed trays or pots with the seed-starting mix and moisten it thoroughly. Sow the seeds about ¼ inch deep, spacing them about 1 inch apart. Gently cover the seeds with more seed-starting mix and water lightly.
- Creating the Ideal Environment: Tomato seeds need warmth and moisture to germinate. Place the seed trays or pots in a warm location, such as on top of a refrigerator or in a heated propagator. The ideal temperature for germination is between 75-85°F (24-29°C). Cover the trays or pots with a clear plastic dome or plastic wrap to maintain humidity.
- Providing Adequate Light: Once the seedlings emerge, remove the plastic cover and provide them with plenty of light. A sunny windowsill may work, but supplemental lighting is often necessary, especially if you are starting seeds indoors during the winter months. Use fluorescent grow lights or LED grow lights, placing them a few inches above the seedlings.
- Watering and Fertilizing: Keep the seed-starting mix consistently moist, but not soggy. Water the seedlings from the bottom to avoid damping off, a fungal disease that can kill young seedlings. Once the seedlings have developed their first true leaves, start fertilizing them with a diluted liquid fertilizer specifically formulated for seedlings.
- Hardening Off: Before transplanting the seedlings outdoors, you need to harden them off. This process gradually acclimates the seedlings to outdoor conditions, reducing the risk of transplant shock. Start by placing the seedlings outdoors in a sheltered location for a few hours each day, gradually increasing the amount of time they spend outside. After a week or two, the seedlings will be ready to be transplanted into your garden.
Troubleshooting Common Seed Starting Problems
Even with the best preparation, you might encounter some challenges when starting tomato seeds. Here are some common problems and how to address them:
- Poor Germination: If your seeds aren't germinating, check the temperature, moisture levels, and light. The soil may be too cold, too dry, or too wet. Ensure that the seeds are receiving adequate light once they germinate. If you have older seeds, germination rate can be low, so plant more seeds.
- Damping Off: This fungal disease causes seedlings to collapse and die. To prevent damping off, use a sterile seed-starting mix, avoid overwatering, and provide good ventilation. If you see signs of damping off, remove the affected seedlings immediately.
- Leggy Seedlings: Leggy seedlings are tall and spindly, with long stems and few leaves. This is usually caused by insufficient light. Provide your seedlings with more light, either by moving them to a sunnier location or by using supplemental grow lights.
- Nutrient Deficiencies: If your seedlings are pale or yellow, they may be lacking nutrients. Fertilize them with a diluted liquid fertilizer specifically formulated for seedlings.
If you find yourself short on space, or if you're eager to get a jump start on growing various plants indoors, consider theAhopegarden Indoor Garden Hydroponics Growing System. This aeroponic growing systemprovides everything you need to start seeds or grow herbs and vegetables right on your countertop. With its built-in LED grow light, you can enjoy fresh, homegrown produce year-round. Check it out here:Ahopegarden Indoor Garden
Transplanting Your Tomato Seedlings
After all your hard work nurturing your tomato seedlings, it's time to move them to their permanent home in the garden. Proper transplanting is crucial for their continued growth and productivity. Here’s what you need to know:
- Choosing the Right Location: Tomatoes need at least 6-8 hours of sunlight per day. Choose a location that receives plenty of sun and has well-drained soil.
- Preparing the Soil: Before transplanting, amend the soil with compost or other organic matter. This will improve drainage, aeration, and fertility.
- Spacing the Plants: Space tomato plants 2-3 feet apart, depending on the variety. Indeterminate varieties (those that continue to grow throughout the season) need more space than determinate varieties (those that grow to a certain size and then stop).
- Transplanting Technique: Dig a hole that is slightly larger than the root ball of the seedling. Gently remove the seedling from its pot, being careful not to damage the roots. Place the seedling in the hole and backfill with soil. Water thoroughly.
- Providing Support: Most tomato plants need support to prevent them from falling over. Use stakes, cages, or trellises to support the plants as they grow.
- Mulching: Apply a layer of mulch around the base of the plants. Mulch helps to retain moisture, suppress weeds, and regulate soil temperature.
Caring for Your Tomato Plants
Once your tomato plants are transplanted, they will require ongoing care to ensure they thrive and produce a bountiful harvest. Key aspects of tomato plant care include:
- Watering: Water tomato plants deeply and regularly, especially during dry periods. Aim to water at the base of the plants to avoid wetting the foliage, which can increase the risk of disease.
- Fertilizing: Fertilize tomato plants every 2-3 weeks with a fertilizer specifically formulated for tomatoes. Look for a fertilizer with a high phosphorus content, which promotes fruit development.
- Pruning: Prune tomato plants to improve air circulation and promote fruit production. Remove suckers (the small shoots that grow in the crotch between the main stem and the branches) regularly.
- Pest and Disease Control: Monitor your tomato plants regularly for pests and diseases. Common tomato pests include aphids, tomato hornworms, and spider mites. Common tomato diseases include early blight, late blight, and Septoria leaf spot. Take appropriate measures to control pests and diseases as soon as you detect them. Organic options such as neem oil are a great way to combat these problems.
- Harvesting: Harvest tomatoes when they are fully ripe and have reached their mature color. Gently twist the tomatoes off the vine, being careful not to damage the plant.
By following these steps, you'll be well on your way to enjoying a bountiful harvest of delicious, homegrown tomatoes! Planting tomatoes from fresh seeds is an investment in flavor, health, and the pure joy of gardening.