Are you dreaming of juicy, sun-ripened tomatoes bursting with flavor, but lack the space or the time for a traditional garden? Or perhaps you're tired of constantly worrying about whether your tomato plants are getting enough water? Then, the world of self-watering containers might just be your gardening salvation! Let's dive in and explore how you can grow amazing tomatoes using this clever and convenient method. The Magic of Self Watering Containers for Tomato Plants Self-watering containers, sometimes called sub-irrigated planters (SIPs), are designed to provide a consistent and reliable water supply to your plants, minimizing the need for frequent watering and dramatically reducing water waste. For tomato plants, which are known for their thirstiness, this can be a game-changer! The beauty of a tomato plant self watering container lies in its simplicity and efficiency. It essentially creates a mini-reservoir beneath the soil, allowing the plant...
There's nothing quite like biting into a sun-warmed, juicy cherry tomato, fresh from your own garden. But getting those delicious little bursts of flavor requires a little planning and patience, especially when it comes to transplanting your seedlings. Get the timing right, and you'll be rewarded with an abundant harvest. Get it wrong, and you risk stressing your young plants, potentially impacting their growth and yield. Let's dive into the when, why, and how of transplanting your precious cherry tomato seedlings.
When to Transplant Cherry Tomato Seedlings: Timing is Everything
Knowing the optimal time for transplanting cherry tomato seedlings is crucial for their success. It's not just about a date on the calendar; it's about understanding the conditions your tomato plants need to thrive. The primary factor is the weather. Cherry tomatoes are warm-season crops and are very sensitive to frost. Here's a breakdown:
The Frost-Free Factor
The golden rule is towait until after the last expected frost in your area. Frost can severely damage or even kill young tomato plants. Check your local weather forecasts and historical data to determine when the danger of frost has passed. A good indicator is when nighttime temperatures consistently stay above 50°F (10°C). Even a light frost can set back their growth significantly, making them more susceptible to diseases and pests.
Soil Temperature Matters Too
Beyond air temperature, soil temperature plays a vital role. Tomato seedlings thrive in soil that's warm enough to encourage root growth. Aim for a soil temperature of at least 60°F (15°C) before transplanting. You can use a soil thermometer to accurately measure the temperature. If the soil is too cold, the plants will struggle to establish themselves and may be more prone to root rot. Warmer soil will promote stronger root development, leading to healthier, more productive plants. You can warm the soil before transplanting by using black plastic mulch for a few weeks before planting. This will not only warm the soil but also help suppress weeds.
Seedling Readiness:Size and Appearance
Besides the weather, the seedlings themselves need to be ready for transplanting. Look for the following signs:
- Size: Seedlings should be around 6-8 inches (15-20 cm) tall.
- Stem Thickness: The stem should be sturdy and strong, not thin and leggy.
- Leaf Development: They should have several sets of true leaves (not just the initial seed leaves, called cotyledons). True leaves are the second set of leaves that emerge after the cotyledons.
- Healthy Appearance: The leaves should be a vibrant green color, free from any spots, discoloration, or signs of pests or diseases.
If your seedlings are smaller than this, it's best to wait a little longer. If they're much larger, they may become root-bound in their containers and require extra care when transplanting. Leggy seedlings can be planted deeper to encourage root development along the stem.
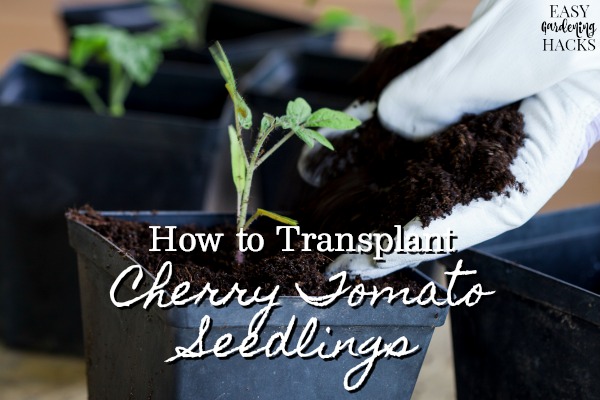
The Process of Transplanting Cherry Tomato Seedlings
Once you've determined that both the weather and your seedlings are ready, it's time to transplant. This process requires care and attention to minimize stress on the plants. Follow these steps for a successful transplant:
Hardening Off: Acclimating Your Seedlings
Before transplanting, you'll need to "harden off" your seedlings. This process gradually acclimates them to the outdoor environment, reducing transplant shock. About a week before transplanting, start by placing your seedlings outdoors in a sheltered location for a few hours each day. Gradually increase the amount of time they spend outside, exposing them to more sunlight and wind. This helps the plant's tissues toughen up, making them more resilient to the elements. Bring them back indoors at night to protect them from cooler temperatures. By the end of the week, they should be able to tolerate a full day outdoors. Skipping this step can lead to significant stress on the plants, potentially hindering their growth and yield.
Preparing the Planting Site
Choose a sunny location that receives at least 6-8 hours of direct sunlight per day. Cherry tomatoes need plenty of sun to produce abundant fruit. The soil should be well-draining and rich in organic matter. Amend the soil with compost or aged manure to improve its fertility and drainage. Avoid planting in areas where tomatoes or other members of the nightshade family (peppers, eggplants, potatoes) have grown in the past few years, as this can help prevent soilborne diseases. Dig a hole that's slightly larger than the root ball of the seedling. Add a handful of slow-release fertilizer to the bottom of the hole to provide the plant with essential nutrients during the initial growth phase. Consider using raised beds if your soil is poorly draining or heavy clay. Raised beds improve drainage and warm up faster in the spring.
Transplanting Techniques
Carefully remove the seedling from its container. If the roots are tightly bound, gently loosen them with your fingers. Place the seedling in the hole, ensuring that the top of the root ball is level with the ground. For leggy seedlings, you can plant them deeper, burying the stem up to the first set of leaves. This will encourage the plant to develop roots along the buried stem, resulting in a stronger, more stable plant. Fill the hole with soil, gently firming it around the plant. Water thoroughly after transplanting to help settle the soil and provide the plant with moisture.
Post-Transplant Care: Nurturing Your New Plants
After transplanting, provide your cherry tomato seedlings with consistent care to ensure they thrive. Water regularly, especially during dry periods. Apply a layer of mulch around the base of the plants to help retain moisture, suppress weeds, and regulate soil temperature. Fertilize regularly with a balanced fertilizer, following the instructions on the label. Provide support for the plants as they grow, using stakes, cages, or trellises. Prune suckers (the shoots that grow between the main stem and the branches) to improve airflow and encourage fruit production. Monitor your plants regularly for signs of pests or diseases and take appropriate action if necessary.
Troubleshooting Common Transplanting Issues
Transplant Shock
Transplant shock is a common issue that can occur when seedlings are moved from one environment to another. Symptoms include wilting, yellowing leaves, and stunted growth. To minimize transplant shock, harden off your seedlings properly, handle them gently during transplanting, and provide them with adequate water and nutrients. If your plants do experience transplant shock, don't panic. Provide them with extra care and protection, and they should recover within a few weeks. You can also use a transplant solution to help reduce stress and promote root growth.
Pests and Diseases
Newly transplanted seedlings are vulnerable to pests and diseases. Common pests include aphids, whiteflies, and flea beetles. Common diseases include early blight, late blight, and septoria leaf spot. Monitor your plants regularly for signs of these problems and take action promptly. Use organic pest control methods whenever possible, such as insecticidal soap, neem oil, or horticultural oil. Ensure good air circulation around the plants to prevent fungal diseases. Remove any infected leaves or plants to prevent the spread of disease.
Poor Soil Conditions
Poor soil conditions can hinder the growth of transplanted seedlings. If your soil is compacted, poorly draining, or lacking in nutrients, your plants will struggle to thrive. Amend the soil with compost or aged manure before transplanting to improve its fertility and drainage. Consider using raised beds if your soil is particularly problematic. Test your soil to determine its p H level and nutrient content, and amend it accordingly. A soil p H of 6.0 to
6.8 is ideal for tomatoes.
Alternatives to Starting from Seed
While starting from seed can be rewarding, it also requires time, effort, and the right equipment. If you're short on time or space, or if you're new to gardening, you can purchase established cherry tomato seedlings from a local garden center or nursery. This can be a more convenient option, as the plants have already been started and hardened off. Just be sure to choose healthy, vigorous plants that are free from pests and diseases.
For those interested in simplifying the process of growing cherry tomatoes indoors, consider an indoor garden kit. For example, theAhopegarden Indoor Garden Hydroponics Growing System, a 10-pod planting setup, offers a convenient way to germinate your plants. Using an aeroponic system with LED grow lights, this hydroponic planter growerat https://amzn.to/3RPpa Sk makes harvesting lettuce and herbs easy and efficient, so it is also good for cherry tomatoes.
Enjoy Your Harvest
Transplanting cherry tomato seedlings successfully is a rewarding experience that leads to a bountiful harvest of delicious, homegrown tomatoes. By understanding the timing, preparing the planting site, and providing consistent care, you can ensure that your seedlings thrive and produce an abundance of fruit. With a little patience and attention, you'll be enjoying fresh, juicy cherry tomatoes from your garden in no time!